Wednesday, December 31, 2014

Happy NYE!!

We are preparing for New Years Eve over here and as usual when I throw a party, I get a bit carried away. We are only hosting a small crowd tonight but I am so excited to pop a few bottles of bubbly and reminisce about the most amazing year EVER!

Seriously, it has been quite the year. Moved from being a contractor to an employee at my job, planned a wedding, Joe graduated and we became Mr and Mrs!! Dear 2015, you cannot top 2014! However,  we are really looking forward to focusing on our careers, settling further into married life and having a more "normal" year.

I have an obsession with glitter so naturally, I chose gold and silver as my color theme with pops of black and white. It is pretty easy to find decor in these colors at stores like Target if you don't have time to hand make many things.


Decor Ideas:

- Gold Glitter Spray
- Spray-painted Beer Bottle
- Framed Printables
- Printables for Champagne Bottles
- Paper Straws
- Gold Charger for Appetizers


One other little detail that I am pumped about is Crate and Barrel's Fortune Cards. There are 12 in a box and each has a pull tab with a New Year fortune inside. Each guest will get to pull one of these at some point in the evening.


Cheers to 2014 being a wonderful year and cheers to 2015 being even better!!

Tuesday, December 30, 2014

DIY Ornament Box

As Christmas holidays come to an end that means taking down the tinsel, wreaths, lights, decor, and of course the tree.  It's a sad day when the decorations go back to their respective boxes.  But I do get a sense of relief in having my home go back to normal, and the organization freak in me loves packing it all up neatly again.

It's that love of organization that made me create some ornament boxes.  As the years go on, my ornaments have overflowed from the previous box so I needed some additional ones.  I chose to stick with shoe boxes so that I could pack them into larger storage bins.  A plain shoe box is too boring so to jazz it up just wrap it in left over Christmas wrapping paper.  It's cheaper than buying a small storage container; plus using paper you've used to wrap presents adds some sentimentality.  And unlike a clear container where you can peek at the contents, the shoe box adds that element of anticipation since you're not sure what ornament you'll be pulling out next.

Great to make for your family, with each member having their own box.  Then come Christmas each member gets to dig and sort through their box to hang their favorite ornaments.  I have loved that my mom did this for us and whenever Christmas rolls around I can't wait to pull out my ornament box for our tree decorating tradition.

The boxes are easy to make and all you need for materials are:
-a shoe box
-wrapping paper
-scissors
-clear tape 

Then to assemble wrap the box and box lid separately in the paper like you'd wrap a present.  And even though you thought you were finally done wrapping presents til next year, it's worth it. 
*Note: If you choose a box with the cover attached (like my red wrapped box) it's a little trickier and will call for some additional snipping and folding, but still doable.  

Easy and fun to make this diy project will organize your holiday decorations and help preserve some great memories.

Monday, December 22, 2014

Pizza Bites

This week officially starts the holiday madness for me. Holiday parties are a blast but one must always be prepared to bring an appetizer or dish to share. If you are in need of ideas, below are the links to a few of my favorite appetizers and mini desserts from this past year:
Another one that I just tried this past weekend with my sister was pizza bites. I would suggest bringing these to a party because you will want to eat them all by yourself. However, besides the taste, the thing that I liked most about these is that they look about 5 minutes to put together. So simple and easy!!

Pizza Bites

Ingredients:
- 2 Cans of crescent roll dough
- 8 Mozzarella sticks
- 1 Package of pepperoni
- 1 Can of marinara sauce

Directions:
1. Unroll the dough and cut all mozzarella sticks in half. Preheat oven to 375.
2. Place mozzarella and three or four pieces of pepperoni and crescent triangle and roll up.
3. Place onto pan and continue until all pieces are done. Bake in oven for 15 minutes or until the crescent roll is golden brown on the outside.
4. Put onto a serving plate along with the marinara dipping sauce.


Friday, December 12, 2014

Memory Ornament Ideas

Wedding Invitation Ornaments 

Turn your wedding invite into a decoration by putting it into a bulb that you can hang on your Christmas tree.  A lot of people will frame their wedding invitation, but this is another great way to commemorate your big day.  Whether you make it for yourself, a friend, or family it's a great option for all those invitations you accumulate.

Read Lisa's post DIY "Marry" Christmas Ornaments for instructions on making these!

 The picture is the invitation ornament I made from mine and Dave's wedding.  I added the blue gems to the ornament since I had those in every one of my centerpieces at the wedding and thought it was a great way to incorporate our wedding colors.  In addition to the invitation I cut into strips, I added ribbon that we used both on our invitations and centerpieces both in the bulb and to hang it on the tree
.
Saving the Bouquet / Engagement Bulb

Lisa's DIY Wedding Ornaments talks about ideas on ways to preserve your wedding memories every Christmas.  She'll walk you through using flower petals from your engagement and wedding bouquet in ornaments to represent your big days every year!

Picture Ornaments

There are so many options that you can do with this idea.  You could make a bulb every year and choose one photo that summarizes the best thing, whether it be a vacation, family outing, birth, engagement, wedding, graduation, I mean the list seems endless.

Depending on the time in your life, it will guide your ornament making.  For example, right now people my age are getting engaged, married, honeymoons, having their first child, and first home.  Lots of firsts.  So these are a thoughtful and money savvy way to show your support for the couple as they go through their BIG life changes.

For more details on this specific ornament check out my post on "PicturePerfect Ornaments" under the Craft Corner Tab, posted on December 27, 2013.


Map Ornaments

A Diamond in the StuffA creative option to turn a fun memory into an ornament is to do so by cutting up a map of the location.  Whether it's where you and your spouse met, a honeymoon locale, vacation, study abroad city, etc you have countless opportunities to memorialize your experiences.

Good options for small cheap gifts, and not time intensive either. You can use an old Atlas or city maps you may have used to navigate.  Also, could go for an updated version instead of vintage look by printing a map off Google. A plus for using Google Maps is the location arrow designating exactly where the event or memory took place.  Options, options, options. Do what you think looks best while considering the resources you have at your disposable.


Graduation Tassel Ornaments
 
Graduation, the big day everyone spends years working towards is finally there.  Once you don the cap and gown, walk across the stage for your diploma, and throw your cap high in the air, those items usually get stuffed in your closet.  Yeah some hang the tassels with their high school colors from the rear view mirror before heading off to college, but soon those too are stuffed in a box.  Same goes for your college graduation paraphernalia.  The newest and super easy way to honor your success and the memories of those school days, is by making an ornament with your tassels.  This way you can bring them out once a year at Christmas to serve as a reminder of those times. Plus, you could make it to hang somewhere at your graduation party if you'd like. It's an ornament anyone could make!

Check out my post on how to make a "Graduation Tassel Ornament" under Craft Corner from May 16, 2014. 
 

Friday, November 28, 2014

Land of Shining Water -MN Series

http://www.traciepetersonbooks.com/landofshiningwater.htmlI was looking for a book series based in Minnesota, and stumbled upon "Land of Shining Water" series that came out last year in 2013. Written by Tracie Peterson these books are a mix of christian historical fiction with a touch of romance of course. 

What really appealed to me was reading these inspirational stories about women back in a time when Minnesota was really just starting to develop.  As a Minnesota native familiar with the areas that serve as the settings in the books, the plots transported me to a simpler time and left me with a sense of awe of just how much changes. Surrounded by Scandinavians, its cool to see links to our past and the culture our ancestors may have been exposed to.  An easy way to get a dose of MN historical culture these books are a great wintery read.

http://www.traciepetersonbooks.com/landofshiningwater.htmlTake for instance the first book. An ice business in MN that shipped ice around the country, makes perfect sense right?! And yet I never knew that factoid or really thought about it, until I saw the movie FROZEN that has captured everyone's heart. And ironically read about that career in MN history from this book soon after watching it. And then since my husband's family grew up in St. Cloud MN reading that story hit close to home.

The Icecutter's Daughter:
Merrill Krause enjoys the family business, harvesting ice during the brutal MN winters. Rurik Jorgenson arrives in their small town to join his uncle doing carpentry, and he soon crosses paths with Merrill.  While they are determined to start a new life, the past is determined to damage their relationship.  Can they learn to trust God - and each other - and embrace the promise of love?

The Quarryman's Bride:
http://www.traciepetersonbooks.com/landofshiningwater.htmlBased in St. Cloud MN Emmalyne Knox and Tavin MacLachian were destined to be together...until the tragic deaths of Emmalyne's sisters.  Family tradition mandates that the youngest daughter should remain single to care for her parents in their old age, and now that daughter is Emmalyne.  Bound by obligation, yet yearning for a future together, can Emmalyne and Tavin dare to dream that God could heal a decade-long wound and change the hearts of those who would stand in the way of true love?

The Miner's Lady:
Based in Ely MN, the Panettas and Calarcos have been sworn enemies for decades, and young love cannot heal the deep wounds between the two iron-mining families.  Chantel can't deny the attraction that flares when she's with Dante Calarco.  But when a tradgedy at the mine occurs, is there any hope that the hatred that has simmered between these two families might be resolved? Or will Chantel's hope for love be buried amidst decades of misunderstanding?

Wednesday, November 26, 2014

Ancestry Collage

Collages are a big thing right now.  When it comes to photos I've always been a fan of taking and displaying lots of pictures. Growing up my room was overloaded with decorative frames, and in college I would cover closet space, desk space, bulletin board space with friend and family pictures. Now that I have my own place, that hasn't changed at all. I wish I had more space, but for now I settle with changing out certain photo collages as the seasons change.

One set of photos that I wouldn't be changing out is this ancestry collage wall! My mom has had this displayed in their dining room for years. A great mix of history, family, and vintage, this ancestry wall is a fabulous idea for dining or living rooms.  This has always been a conversation piece, and inspires lots of story sharing.  People always enjoy looking at family traits and seeing what traits have remained through the generations. Pretty fun to see who looks like who, especially for those great-grandparents and great-great-grandparents you might not have had the chance to be blessed with meeting.

A fan of history and ancestry this decoration is something I can't wait to be given in a few years. Already I have planned who else I'll be adding to the wall now that my husband and I are married. Currently the wall showcases my grandparents on both sides, great-grandparents, and great-great grandparents.  Soon I'll be adding both Dave and my parents to the mix. And don't forget Dave's grandparents too!

It's a cinch to make; the difficult part being able to obtain old family photos. But once you find them, it's much more fulfilling to be displaying them in your family home then letting them sit in an old photo album!  My mom decided to take the route of finding very similar colored frames, which considering the black and white or sepia photos the black detailed frames make the photos POP! It may be hard to tell from the photos, but each frame has intrinsic details that when viewed closer add more interest then just solid black frames. Plus, fits the inspired vintage look!

Just a recommendation, on the back of the copied/original photos make sure you label who is who.  When you start to get into the older generations it can be difficult to remember, and that's something you don't want to forget. So start compiling those family photos! 

This Thanksgiving and holiday season is the perfect time to connect with family, reminisce and gather some family history to display in your home all year round!

Tuesday, November 25, 2014

Thanksgiving Cocktails and Crafts

Just before we launch into all things Christmas... I'd like to spend just a bit of time talking about Thanksgiving decor and Thanksgiving goodies. Here are a few ideas for your Thanksgiving weekend including a craft idea for the kids and my favorite fall drink for the adults!

For the Adults: Cranberry Cocktail

Ingredients:
- Gin
- GingerAle
- Cranberry juice
- Lemon
- Lime
- Cranberries

Directions:
1. Fill the bottom of the glass just over 1/4 full of gingerale. Add 1 shot of gin (or more!).
2. Fill the remaining part of the glass with cranberry juice.
3. Squeeze one lemon and one lime into the glass. Add ice.
4. Garnish with some floating cranberries.

Another easy Thanksgiving cocktail is champagne and cranberry juice topped with some pretty floating cranberries. Cheers!


For the Kids: Turkey Craft


I did this craft with my little girl's group and I can attest to it still looking cute on my fridge a couple of weeks later. I told the girls to collect the leaves of their choice and then think of things that they were grateful for. As we did the craft, each girl shared a little about their blessings.

Supplies:
- Construction paper
- Glue
- Markers
- Leaves

Directions:
1. Cut a large circle and a smaller one to make the turkey.
2. Glue the leaves in a feather fan pattern behind the larger circle.
3. Decorate as desired!


For Family Dessert Fun: Pumpkin Rice Krispies

Supplies:
- 1 bag of candy corn marshmallows
*Note: You can also use normal marshmallows and use food coloring to make the orange coloring
- 3 tbsps of butter
- 6 cups Rice Krispies
- 1 bag of tootsie rolls

Directions:
1. Melt butter in a pan over low heat.
2. Add marshmallows and if needed, food coloring.
3. Slowly begin to add Rice Krispies until fully added and remove from heat.
4. Allow time to cool before handling. Roll into balls.
5. Shape to get the desired pumpkin shape.
6. Cut tootsie roll in half and add to the top.


Friday, November 21, 2014

DIY Famous Couples Art

There have been a few oddball crafts that I have been working on while trying to set up our new home. I had purchased a picture frame for our guestbook that we ended up not using. However, it matches the color of our bedroom so I wanted to make use of it. I ended up looking high and low for a print that would fit the 11.75 x 36 frame and could not find a single one that I liked. As usual, this lead me to the conclusion that I needed to make something of my own.

Famous Couples Art

I used a paper cutter to get even strips of white paper and then used the purple for the matte color. I thought long and hard about the famous couples that I wanted to include. I fancied some of the following: Darcy and Lizzy, Popeye and Olive, Beauty and the Beast... the list goes on. You could also theme your art, ie. Disney couples or Biblical couples. I also chose to include "Mr and Mrs" in the middle. Another cute idea is including the couples name, ie. "Joe and Lisa."

I wrote different fonts with a sharpie for each strip to make it visually interesting. Let's just say that my husband was super proud of those little details. At first, he didn't believe that I wrote them... is my normal handwriting that bad??

Now we have a sweet little piece in our bedroom and I do not have to feel guilty about an empty frame laying around. I also love the fact that this art was free, so if I ever find something to take its place, there will be no hard feelings or second thoughts.

Friday, November 14, 2014

Taco Bell Quesadilla Sauce

Everyone has guilty pleasures and pleasant indulgences. Unfortunately, we call them indulgences because we really should not take satisfaction in them often. Don't get me wrong, I'd love to have a cupcake every day. But I try to exercise some will power!

One of my fast food favorites is Taco Bell's quesadillas. Recently, my husband has been into homemaking well known sauces. He found a recipe online for Taco Bell's quesadilla sauce and we decided to try it. The first batch was good but I adjusted the recipe a bit the second time we made it. The second batch was incredible! It only makes three standard sized tortilla quesadillas but that is probably a good thing.


Taco Bell DIY Quesadilla Sauce: 

- 1 diced jalapeno
- 1/4 cup mayo
- 1 tlbsp hot sauce
- 3/4 tsp sugar
- 1/2 tsp paprika
- 1/2 tsp ground cumin
- 1/8 tsp chili pepper
- 1/8 tsp garlic powder
- pinch of salt

Combine all of the ingredients today and when ready, spread onto the inside of a tortilla. Add desired toppings, we usually add cheese and diced cooked chicken.

This sauce is truly awesome. Give it a try and make that fast food quesadilla indulgence a little healthier and more cost effective!


Wednesday, November 12, 2014

Stickball DIY Wedding Centerpieces


It is all in the details. 

When it came to wedding planning, I was ALL about the details. I knew that many of these details would be lost on our guests but that didn’t deter me. I was bound and determined!

I knew that I did not want flowers as our centerpieces. As beautiful as they are, they can be pricey and I wanted to have some personal, crafty touches in our space. Someday soon I will share the whole set up but for now, I will focus on one piece of the centerpieces: Stickballs. 

Not sure that there is a technical name for these babies. They look almost like a sea urchin (Target has some similar décor right now, which made me oh-so-proud!). But they were a blast to make and not too difficult, although a bit time consuming.

I had found an image of a similar décor piece quite some time before the wedding and knew immediately that I wanted to incorporate it somehow. Once we got engaged and we had set a date, I immediately started working away. We had three different centerpieces with different stickballs used in each: one large stickball, two purple stickballs of varying sizes or one gold stickball.  


Supplies:
- Different size Styrofoam balls (I found a huge set of 50 on eBay for an affordable price)
*Note: Try to make sure that the Styrofoam balls are over 1 inch. We found the ones that worked best were between 1.5 and 3 inches.

- Craft Sticks (I found large boxes of 2500 on Amazon for under $5)
*Note: Do not use toothpicks unless you are okay with sharp ends

- ModPodge or craft glue
*Note: You can use hot glue but it gets a little stringy. It would be cute if you’re going for a Halloween look!

- Spray Paint
*Note: Find something that is silk, floral and foam safe. I learned the hard way and had some of my gold paint erode the foam, making the whole stickball collapse.

Directions:
1. Start by pouring glue onto a paper plate. Add some glue to the end of each craft stick and insert it into the Styrofoam ball until it feels sturdy. Some sticks may need to be pushed in farther than others before being secure.

2. Insert craft sticks in desired density. I did a variation of some being fuller and others being more parse. I tried to add more sticks to the larger Styrofoam balls to give a variety of looks.

3. Let glue dry before spray painting. Paint so that all the wooden sticks are coated. You may need to move the stickball around quite a bit in order to get it completely covered.

That is how easy these were! While the directions are simple, be warned that they are a bit time consuming. I had a few lovely helpers during my several months of crafting. But it is easy to work on them while watching a show, talking on the phone or with a glass of wine while catching up with friends. 

I absolutely loved the look of these on the wedding day. They were simple and dynamic at the same time, not to mention light and easy to transport to the reception set up! And we had no guilt about tossing most of them afterwards. Of course, I kept a few for our home. I may have to whip up a few more for Christmas décor, I am already dreaming of how dashing they would be painted white with some jazzy glitter!


Thursday, November 6, 2014

Homemade Mozzarella Sticks

This recipe is absolutely awesome and one of our favorite things that we have made in awhile. My husband has a ridiculous love of mozzarella sticks, they are his go-to appetizer. I dislike buying them from the grocery store since they have hardly any nutritional value and frankly, aren't that satisfying.

I saw this recipe on Pinterest and floated it by Joe. His eyes got HUGE and we quickly ran to the grocery store to get all the supplies.

These are not only amazingly delicious but they are also much more fresh and healthier than other options. And an added bonus, they took less than 15 minutes to make. We will be making more!

Ingredients:
- Mozzarella sticks
*Immediately put these in the freezer. They must be fairly hard or they will not keep their shape while cooking.
- 1 egg
- 2 Tablespoons flour
- 1/2 cup Panko bread crumbs
- 1 Tablespoon Italian Seasoning

Directions:
1. Preheat oven to 350.
2. Whisk egg in its own bowl and set aside.
3. Add flour to a bowl and combine bread crumbs and seasoning in another bowl.
4. Half all of the cheesesticks if you haven't already.
5. Dip each cheesestick in the flour, followed by the egg, followed by the bread crumbs and seasoning mix.
6. Place on a baking sheet and cook for 5 minutes. Flip each stick over and cook another 5 minutes.

Seriously so yummy! We had a little marinara with these and they were fresh and tasty. We had these as an appetizer to our Bang Bang Chicken. Highly recommend with the husband stamp of approval!

Bang Bang Chicken

Having people over for dinner is always a great excuse to try a new recipe. Of course, there is always the danger that it turns out terribly and then you have to order a pizza later... but in my mind, it is worth the risk!

Hosting dinners with my husband is turning into one of my most treasured past times. Joe has not ever been much of a cook (although he has always made a mean bacon and eggs breakfast!) but when we are responsible for dinner, he is ready and willing to pitch in. We crank up the music as flour, spices and sometimes knives fly all over the kitchen. 

We recently were able to host some of his family for a small dinner. We decided last minute to try some new dishes and thank goodness, they turned out perfectly!

Bang Bang Chicken

We thought this was going to be spicy but in fact, it was pretty mild. I think I would add a bit more hot sauce to the batter next time around. The sauce was tasty and would be easy to whip up anytime you'd desire.

Ingredients:
- 1 pound chicken
- 1/2 cup corn starch
- 3/4 cup flour
- 1 egg
- 1 tblsp hot sauce
- 1 cup buttermilk
- 1 cup panko bread crumbs
- 1/2 cup vegetable oil

Sauce:
- 2 tblsp sweet chili sauce
- 2 tsp hot sauce
- 1/2 cup mayo
- 1 tblsp honey

Directions:
1. Preheat a frying pan with the vegetable oil. Grab a bowl and mix buttermilk, corn starch, flour, egg and hot sauce.
2. Cut chicken into large cube sizes. Dip chicken in batter and then cover in Panko bread crumbs.
3. Throw them into the frying pan and cook 2-4 minutes until the outside is brown and crispy and the inside is fully cooked through. Continue until all the chicken is cooked. Serve immediately.
4. Mix sauce in a bowl and set aside. You can either drizzle over the chicken or put it on the side as a dipping sauce.

We served this with salad, potatoes and homemade mozzarella sticks. I used it on my salad the next day at lunch and while not as crispy, was still quite flavorful and scrumptious.

Tuesday, November 4, 2014

Mini Apple Pies

I ran across these beauties while searching for a fast and easy fall dessert. These are so awesome. You will feel like a chef when you pull them out of the oven! They are beautiful and scrumptious and perfect for a brisk fall evening.

Ingredients:
- 4 apples (Makes 4 servings)
- 1/2 cup of sugar
- 1 Tablespoon of cinnamon 
- 2 Tablespoons of melted butter
- 1 Packet of frozen pie crust

Directions:
1. Start with cutting off the tops of the apples and scooping out the insides. Collect insides in a bowl and throw away the seeds and core.
2. Preheat oven to 400 and allow pie crust to defrost.
3. When ready, combine sugar, cinnamon and apple inside in a bowl. Scoop the mixture into the hollowed middle of the apples.
4. Cut strips of pie crusts. I used puff pastry so that it wasn't too dense. Layer the strips on the tops of the apples.
5. Place a layer of water in the bottom of a sided baking dish. Put apples into the dish.
6. Cover the tops of the apples with the melted butter, try to brush the pie crust. Add some cinnamon sugar to the top.
7. Bake for 35 minutes or until tops of the pastries are golden brown.

They were a hit and I will definitely be making these again next fall. Nothing beats few ingredients, quick recipe, fresh food and amazing results!


Wednesday, October 29, 2014

Chocolate Bombe

Chocolate lovers out there this if for you. Rich, delectable, and a dessert covered in chocolate, the Chocolate Bombe makes a unique cake for a special occasion.  Whether it's for Easter or a birthday party, the cake is overall easy to assemble and sure to impress guests. Just look at that picture! YUM! The name makes me think of a chocolate bomb, it's that explosive.

This recipe came from my mother's Daytons cookbook that she collected when she used to work at Daytons.  For you younger generations, Macy's used to be Marshall Fields, which used to be Daytons, which took over/joined Hudson stores therefore becoming Dayton Hudson.  Daytons had thrown a potluck for their 24,000 employees and 500 winning recipes came together to form this potluck recipe book. My mom says it was a really enjoyable event, since it was a fun way for the employees to socialize and try everyone's best recipes. This Chocolate Bombe was in the book and came from Camille Atkinson from the Hudson's Ann Arbor.

This recipe came from 1989, and within that time frame one ingredient required for this recipe, a can of almaretto almond frosting, disappeared off grocery store shelves.  We attempted to purchase it over the counter from bakeries, but that's not as popular an option as people are stealing the frosting for their own baking use.  Therefore with a few ingredients we made our own. We'd recommend maybe to even use less frosting than the recipe requires, since it's already rich. But that amaretto liquor really steps this cake up, and makes it a great cake for celebrating those older birthdays.

Ingredients

12 oz (12 squares) semi-sweet chocolate
3/4 cup butter
5 egg yolks
8 egg whites
1/4 cup sugar
1 tsp vanilla
1 baked angel food cake
12 oz (12 squares) semi-sweet chocolate
1/4 cup vegetable oil
16 oz can amaretto almond frosting
*Note: to make the frosting we used 1 can classic vanilla frosting, added 4 tsp flavored liquor (Amaretto), and 1 tsp vanilla extract.

Directions

In large saucepan, melt 12 oz chocolate and butter over medium heat.  Remove from heat.  Stir in egg yolks.  Cool to room temperature.  In large mixing bowl, beat egg whites and sugar until stiff peaks form.  Fold egg whites and vanilla into chocolate mixture. 

Cut angel food cake into strips.  Line 9 inch bowl with strips.  Fill with chocolate mixture.  Top with a layer of angel food cake strips.  Freeze overnight.  Un-mold bombe onto serving plate.  Frost with a layer of frosting.  Refrigerate.  In saucepan, melt 12 oz chocolate with oil.  Cover bombe with chocolate mixture. 

Serve immediately or return to freezer. Cover with plastic wrap to freeze.

Tuesday, October 14, 2014

Pumpkin Whoopie Pies

A dear coworker of mine left my team for another job and we threw a little going away party for her. I was looking for an excuse to do a little fall baking so volunteered to bring some treats. These were the perfect fall dessert!

Pumpkin Whoopie Pies

I used Krusteaz Pumpkin Spice Mix. I used the bread recipe since I did not want my whoopie pies to be too dense or overly sweet. One bread mix packet made 18 medium whoopie pies.

I had some silicone baking sheets that I had purchased on sale after last autumn. They worked like magic and added an adorable fall touch! Admittedly, I had a bit of OCD when I noticed that the tops had bubbled out. I cut off the tops so that the imprinted side could lay flat while face up. However, the tops were scrumptious to nibble on while I finished the whoopie pies!

Cream Cheese Filling:
- 6 oz cream cheese
- 6 tablespoons butter
- 1/2 teaspoon vanilla
- 1 1/2 cups of powdered sugar

Mix all ingredients together. Cut whoopie pies into halves and once cool, spread or pipe the filling into the whoopie pies. Refrigerate until shortly before serving. Now, pair this with a carmel apple bar and you have yourself a party!


Monday, October 13, 2014

Sweet BBQ Crockpot Chicken

BBQ...yum!  It's hard not to have your mouth water at the mention of bbq.

This isn't one of those recipes that will take a whole lot of attention and  constant surveillance to make sure it turns out just right.  Easy to just throw the ingredients in the pot and let it cook unsupervised until dinnertime rolls around and you break out the buns to serve this fall apart bbq chicken.

This is one recipe you can add to your make-ahead and freeze recipe collection.  Perfect for those with busy lives and looking for a cheap no fuss meal. 


Ingredients

4-6 chicken breasts
12 oz bottle of BBQ sauce
1/2 cup brown sugar
1/4 cup vinegar
1 tsp cayenne pepper
1 tsp garlic powder
Salt and pepper

*Note due to large amount of sauce 6 chicken breasts works well. Use 1/2 tsp cayenne for less heat.

Directions

1) Cook on LOW in slowcooker 4-6 hours.
2) Serve the chicken as is OR
Shred the chicken and place back in the cooker if you're looking to make bbq sandwiches.
3) Serve alongside some corn, cornbread, or coleslaw to round off the meal.

Friday, October 10, 2014

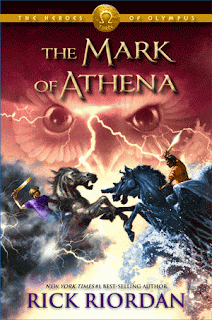
Heroes of Olympus

Another series by Rick Riordan that I absolutely fell in love with. It's hard not to when the books are well written and full of adventure, myths, monsters, deities, and heroes. A new Great Prophecy and a new generation of demigods. In this 5 book series you revisit old friends with a new cast of main characters, the heroes of Camp Half-Blood embark on the most dangerous challenges yet.

http://www.rickriordan.com/my-books/percy-jackson/heroes-of-olympus/The-Mark-of-Athena.aspxhttp://www.rickriordan.com/my-books/percy-jackson/heroes-of-olympus/the-lost-hero.aspxhttp://www.rickriordan.com/my-books/percy-jackson/heroes-of-olympus/thesonofneptune.aspx

http://www.rickriordan.com/my-books/percy-jackson/heroes-of-olympus/The-Blood-of-Olympus.aspxhttp://www.rickriordan.com/my-books/percy-jackson/heroes-of-olympus/The-House-of-Hades.aspx


Percy Jackson and the Olympians was the preceding series to The Heroes of Olympus. If you haven't already heard of the Percy Jackson series which has blown up in popularity of the books and been turned into movies, you should talk to some teens. Widely popular, there is a lot to like about both series.  If you want to find out more about the Percy Jackson and the Olympians series check out my previous post.

Now if someone is interested in the Heroes of Olympus series they don't need to read the Percy Jackson series, HOWEVER the two do intertwine and continue from the previous series. So what I'm trying to say is it's a mistake not to read both series.  Plus reading all the books in the correct order will of course answer any questions that might pop up and best explain the workings of Ancient Greek and Roman mythology. Because let's be honest not all adults are up to speed on mythology, even some of the basics.  Kids seem to get a real kick out of the books, both male and female.  These are like the Harry Potter Books that used to be the main books to read back in my day.  Am I really that old already?

So whether you are a teen, or have a teen in your family it's worth sharing the series with them if they haven't already picked it up.  Plus the books make great gifts for birthdays and Christmas.  Who doesn't like to encourage reading by gifting a fabulous book or two or a whole series?

And hey I'm in my mid twenties and I greatly enjoyed them. Laughing out loud, having the books gripped in my hand til I turned to the final page, and then I'd walk over to my stack of books and start right in on the next one. I'm sure you can tell patience is not one of my stronger virtues. But lucky for you, all the books are out and so you don't even have to wait for a release of another book in the series like I had to...it was torture. Did I mention I lack patience? Well in case I have failed to convince you it's in your best interest to share/read these novels check out the summary of the first book. I didn't want to give anything away by writing ones for the others, since I'm hoping you'll be intriugued enough and take up my challenge to read the series. I mean look at the covers! Isn't your interest a little piqued?

If you do want more information on the books check out Rick Riordan's website.  From there I got these great pictures of the covers and there are summaries for the novels, and the order in which to read them.

Tuesday, October 7, 2014

Carmel Apple Bar


Fall is such a beautiful season. Whether its fall fashion, fall baking or pumpkin crafts, we here at TITC are big fans of the change of colors and the anticipation of holiday season!

I am always looking for creative ideas for get together each season. Last winter, I put together a hot chocolate bar and wondered how I could incorporate something similar for fall. I decided to try the idea out with caramel apples. 

Carmel Apple Bar

Apples:

Depending on how fancy you want to get, you could get all sorts of different apples. Since apples are lower priced and there is a large variety in the fall, you could get anything from Honeycrisp to Pink Lady to Gold Ginger!

You could include whole apples with popsicle sticks in them. Or just have slices available with a skewer in them for easy dipping.

Toppings:

Carmel, of course! You could also include chocolate and peanut butter for some fancy concoctions. 

Extras:

Some traditional add-ons include: m&m candy, chocolate sprinkles, peanuts and candy corn. A few other ideas are marshmallows (We used some that were candy corn flavored!), toffee, chocolate chunks and graham crackers.

What a fun addition to a fall party or get together! For other great fall and holiday ideas, check out our Pinterest page!

Thursday, October 2, 2014

End of Alzheimer's Walk 2014

This past weekend I was able to participate in the Alzheimer's Walk in Minneapolis. My family took part of this amazing cause in honor of my grandfather, who currently has Alzheimers. It felt great to not only support this organization but to do so with my family made it more empowering.

Alzheimer's is a disease that causes memory problems due to dementia. According to the Alzhiemer's Association, Alzhiemers accounts for 60 to 80 percent of dementia. It is a progressive disease and there is currently no cure.

At the walk, they provided four different colored windmill flowers. Blue meant that you had Alzheimers, purple meant that you lost someone to Alzheimers, yellow meant that you loved or are caring for someone with Alzheimers and orange meant that you supported the end of Alzheimers. It was breathtaking to see the hundreds of colored flowers being raised into the air at the beginning of the walk. It was moving to see all those who have lost loved ones or are caring for loved ones with Alzheimers. 

My grandpa is an amazing man, a veteran. We love him dearly and while there are plenty of simple, beautiful moments that we enjoy with him, there are equally as many hard moments. My grandma is an amazing example of love and patience. I have also watched my dad and his siblings love up their dad and mom. They have done an incredible job supporting one another and learning about the disease to try and better care for their dad.

I am lucky to have such a sweet grandfather and to be part of such a great family. I will be supporting the Alzheimer's Association going forward and it was an honor to be a part of the annual walk.

Wednesday, October 1, 2014

Wedding Guestbook

Most wedding days are a blur, especially the reception portion of the event. While there are some amazing moments that have been etched into my memory, I can attest to that being the case. We were so incredibly happy. We talked to everyone and their mother, gave giant bear hugs, rocked out on the dance floor. At the end of it all, we wanted to remember who was able to celebrate our big day with us. Cue the guestbook.

These days, there are so many options for a creative guestbook. I am sure many of you have seen the thumbprint trees, the photo booth strips in a scrapbook or writing notes of love and encouragement in a photo album.

A few of my other favorites are signing a monogram wooden letter, signing rocks to be placed in a vase or writing on wine bottles to be opened and drank by the happy couple on future wedding anniversaries.

With so many options to choose from and so many ideas already used, I wanted to do something different and out of the box. That said, I also wanted to create a guestbook that we could display easily in our home. I ran into a couple of ideas that I liked and ended up deciding on a variation of my own.

One of my new sister-in-laws is an amazing artist. Someday I will share more on her art and hopefully she will have a website available by then! She kindly agreed to help make our guestbook a reality. We picked out some paper, a beautiful frame and she took it from there! 

Liz drew a man and woman snuggled up in a boat, fishing. She clearly knows us well because she included an anchor and some turtles. She made the most incredible background out of old book pages, which created a stunning layered look for the backdrop. It was a perfect subtle tie in to our reception venue. Did I mention that we had our reception in a library?! We were able to display the precious and treasured artwork at the wedding on an easel.

We had our guests sign fishes for us to add later. I used the Cricut machine to cut out all different sizes of fish using black, gray, gold and purple papers. To sign the fish, we had black, purple and gold pens. I made some instructions and put them in a flashy frame that read, “Two less fish in the sea” and to “Catch a fish and sign your name.”


I am still working on putting it all together but I know that it is going to be a prized piece in our home. It was special to go through all the little notes and signatures. My husband and I feel like we have both found the “perfect catch” in each other and think our guestbook is a beautiful reminder of all the other amazing people who fill up our colorful “ocean” of a life.  


Of all the fish in the sea, I choose you.