Wednesday, April 30, 2014

Starbucks "You Are Here" Collection

When I was in NYC with my dad and sister about a year ago, we came across a cute city mug at the Starbucks we were at. We saw the mug a couple more times throughout the trip (we frequented Starbucks more times than we'd care to admit). I was bummed when I came back home that we hadn't grabbed one as a souvenir. A few weeks later, I was thrilled to discover that my local Starbucks has the same collection of city mug for the Twin Cities.

I ended up doing a few hours of research on the mugs since I was curious which cities had them and how long they had been around. Turns out that the recent collection is fairly new. There was a bit of a backlash when it started since many people had been collecting the previous collection for years. While there does need to be a certain number of Starbucks stores in a city to quality, most large cities have their own unique mug based on their lifestyles, histories and unique landmarks. I love the new style as each mug is colorful and vibrant.

I began collecting them and it's been a sweet little memento from a few different trips. My dad was kind enough to grab my sister and I mugs on his recent NYC trip to add to our lists. The "You Are Here" collection will definitely be go-to mugs in my kitchen and are great reminders of adventures past.


Tuesday, April 29, 2014

Mexican Rice

It's always nice to have a rice recipe in your back pocket, one that extends beyond just basic rice.  This Mexican Rice recipe would be a great accent to any dish, like chicken.  It's a great pairing because the flavoring isn't so dominant that it would take over the meal.  It's also relatively quick and I like knowing what I'm adding to the dish compared to the prepackaged rice sides.  The packaged rice sides have the benefit of being speedy, but this cooks quickly too and has one up in the flavor department.  Pretty sure the cheese rounds off the dish, so no skimping in that department! There's just something special about Mexican food, and this mexi rice, accented with something like lime chicken, will satisfy the palate.  Paula Deen might not be Mexican, but she sure nailed this recipe.

Mexican Rice
Paula Deen
Servings: 8-10
Prep Time: 10 min
Cook Time: 20 min

Ingredients

2 tbsp butter
1 1/2 cups long grain rice
1/2 cup chopped onion
1/2 cup chopped green bell pepper
1 clove garlic, minced
2 cups water (lil more)
1 (14 1/2 oz) can diced tomatoes with chilies (Ro-tel)
1 tsp chili powder
1 tsp salt
1 cup shredded cheddar

Directions

1) In a large saucepan melt the butter over medium heat.
2) Add rice, onion, peppers and garlic.  Cook rice til browned and vegetables are tender.
3) Stir in water, tomatoes, chili powder and salt.  Bring it to a boil.
4) Reduce heat and simmer, covered, until the rice is tender.  Takes 15-20 minutes.
5) Stir in cheese and serve.

Monday, April 28, 2014

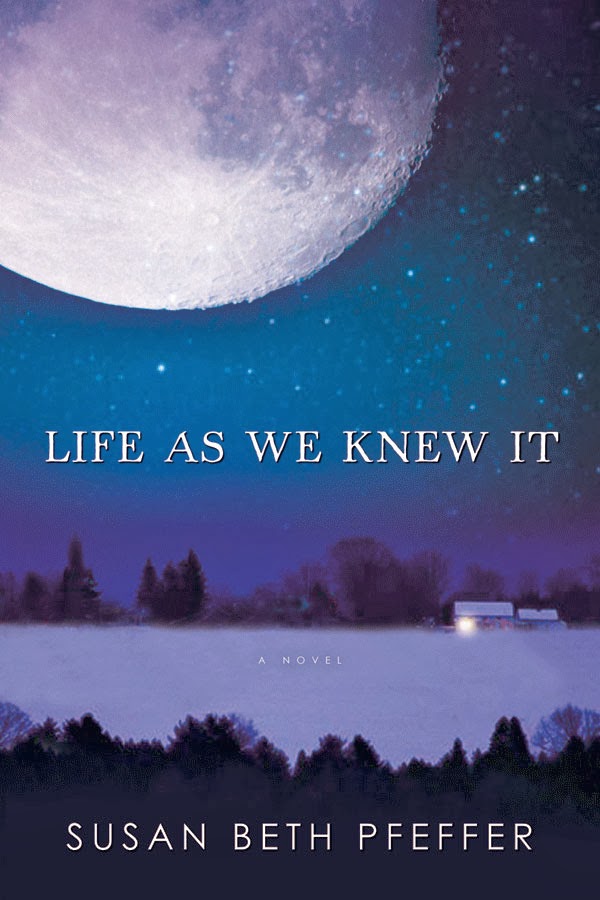
Life As We Knew It series

http://susanbethpfeffer.blogspot.com/Author:
Susan Beth Pfeffer

The middle school that I was frequently subbing at chose this book series to end the school year.  Along with reading the books, the 8th grade teachers had put together a fun day of activities pertaining to the books.  The concept of the books is that young people are put in situations where their decisions and resources could mean life or death.  The life they knew no longer exists and everything comes down to survival.

I totally got into it!  Read all the books.  Problem is, I automatically started planning what my strategy would be if world disaster was in sight.  What tasks would I delegate to who? What grocery store would I hit up?  What items would I go for first? What items around the home would I have of use already? Where's the most optimal home base? Fuel for a car? Fuel for heating? You can see how reading these books was not exactly a calming activity for me. But hey, if the moon ever gets knocked out of orbit, I'll be one of the first ones ready to respond.  Well, me and the whole 8th grade team that is. 

Thing is I have a tendency to be worried about natural disasters, even if the chances are miniscule.  Even as a young girl I convinced my parents to stock up on some essentials during the Millennium Bug scare, also referred to as the Y2K back at the start of 2000.  Remember that whole thing? Heck even then I was in survivalist mode.

Maybe it's all the movies and books out there that proclaim the world is ending, or at least being significantly destroyed and altered.  Some people now are making sure they have a small stockpile or at least some essentials for a survival situation.  Maybe it's like back in the 50's when people were putting up bomb shelters for protection against what they saw as an impending nuclear war.  Well no matter what we may or may not experience during our lifetime, these books bring you into a world falling apart at the seams. Written in the perspective of the young survivalists, you can't help but cheer them on, and pray we will never be in the same situation. 


http://www.hmhbooks.com/lifeasweknewit/books.htmlSummaries

Life As We Knew It
When Miranda first hears the warnings that a meteor is headed on a collision path with the moon, they just sound like an excuse for extra homework assignments.  But her disbelief turns to fear in a split second as the entire world witnesses a lunar impact that catastrophically alters the earth's climate-and results in mass devastation. 
Told in Miranda's diary entries, this is a heart-pounding account of her struggle to hold on to the most important resource of all - hope - in an increasingly desperate and unfamiliar time. 
http://www.hmhbooks.com/lifeasweknewit/books.html
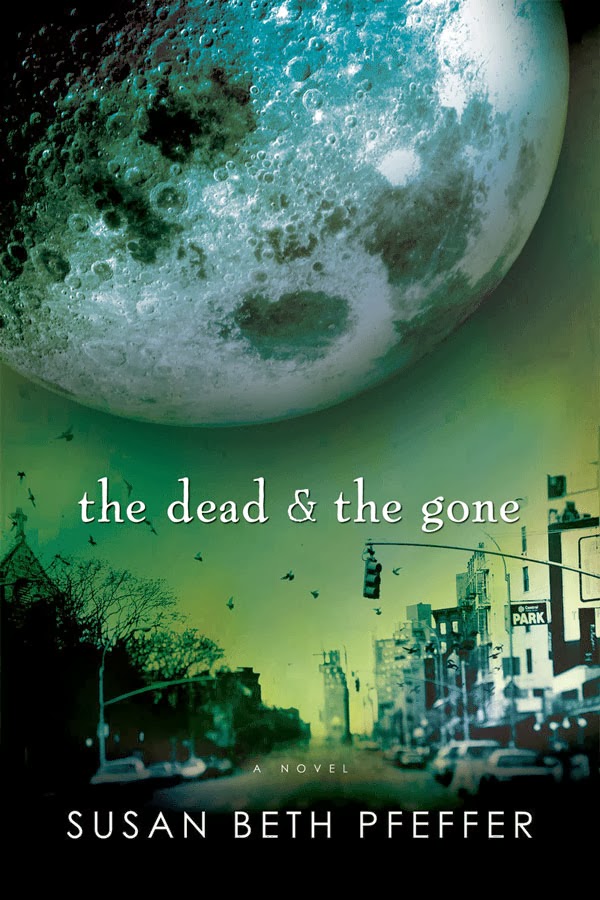
The Dead & The Gone
Alex Morales was working behind the counter at Joey's Pizza when life as he knew it changed forever.  He was worried about getting elected as senior class president and making the grades to land him in a good college.  He never expected an asteroid would hit the moon.  He never expected to be fighting just to stay alive.

http://www.hmhbooks.com/lifeasweknewit/books.html
This World We Live In
It's been a year since a meteor collided with the moon.  For Miranda Evans, life as she knew it no longer exists.  Her friends and neighbors are dead, the landscape is frozen, and food is increasingly scarce.
The struggle to survive intensifies when Miranda's father and stepmother arrive with a baby and three strangers in tow.  One of the newcomers is Alex Morales, and as Miranda's complicated feelings for him turn to love, his plans for the future thwart their relationship.  Then a devastating tornado hits the town of Howell, and Miranda makes a decision that will change their lives forever.  
http://susanbethpfeffer.blogspot.com/


The Shade of the Moon
It's been more than two years since Jon Evan and his family left Pennsylvania hoping to find a safe place to live, yet Jon remains haunted bu the deaths of those he loved.  His prowess on a soccer field has guaranteed him a home in Sexton, the well-protected enclave he entered with his stepmother, Lisa, and her son, Gabe, using the three safe-town passes they were given.  But Jon is painfully aware that a missed goal, a careless word, even falling in love, can jeopardize his life and that of his sister, Miranda, who lives outside the walls of Sexton.  When everything he values is at stake, can Jon risk doing what is right in a world gone so terribly wrong?

Friday, April 25, 2014

Buffalo Chicken Salad

Ever get that buffalo chicken craving?  I know it well.  My substitute for a restaurant, because who can afford that as much as I crave buffalo chicken, is this salad.  Not only does it taste good, it's healthy(ish)!  Double points for this salad!

Made this on weeknights since it's fast and tasty.  As we head into the summer months I know this will be appearing on my table more frequently.  It makes a great lunch or dinner option, even take it to work the next day.  It's easy to assemble and requires only some basics to have on hand.  You can go for the homemade touch on the bleu cheese dressing.  Or mix some of your favorite bleu cheese dressing in a bottle with some bleu cheese crumbles and you'll be all set.  No judging from me on what option you pick.

I'm sure you'll enjoy throwing this beauty together.  Gotta say the end result exceeds the work put into it.

Buffalo Chicken Salad
Ree Drummond - Pioneer Woman
Servings: 2     Prep Time: 10 min     Cook Time: 10 min

Ingredients
  • 1 whole Boneless Skinless Chicken Breast
  • Salt And Pepper, to taste
  • 2 Tablespoons Olive Oil
  • 2 Tablespoons Butter
  • 1/2 cup Frank's Hot Sauce
  • Salad Greens: Iceberg, Romaine, Mixed Greens
  • 1/2 cup Blue Cheese Dressing
  • Blue Cheese Crumbles
  • Celery Hearts, with leaves intact
Directions 

1. With a sharp knife, slice the chicken breast in half from top to bottom. You'll have two similarly-sized chicken breasts that are much thinner. 
2.  Heat olive oil & butter in a small skillet over medium-high heat. Salt and pepper both sides of the chicken breast pieces and pan fry them on both sides until they're done. Get as much golden brown color on the chicken as you can. When it's done, remove the chicken from the skillet and pour off any excess fat/oil.  *Note: don't clean the pan
3.  Turn off the heat.  Slice the chicken into thin slices.  Return the chicken to the skillet and pour the hot sauce. Coat the chicken on both sides and let it sit in the sauce while you prepare the other ingredient.
4. Toss the lettuce in a large or individual bowls with just enough salad dressing to lightly coat it.  
5. Add the buffalo chicken. Then top the whole thing with  blue cheese crumbles and serve with celery hearts.

Other great salads to whet your summer appetite:
Strawberry Chicken Salad
Avocado Corn Salad
Watermelon Arugula Salad 
Broccoli Salad 
Pioneer Pasta Salad

Check out our Market Inspirations for Summer

Wednesday, April 23, 2014

DIY Cake Plate

A few weeks ago, I was visiting my local thrift store when I came across a beautiful candle holder. It was a bit beat up but very inexpensive (a piddley $4) and I immediately thought of trying my hand at a homemade cake plate. These are all over Pinterest and even the consignment bridal store that I have visited a number of times has shelves of these. It is a wonderful way to give your appetizers or desserts some elevation and provides a stunning visual effect. The entire project cost me a total of $8!

Supplies:
  • Candlestick with flat top
  • Old, thrifted or newly purchased plate
  • Hot glue or gorilla glue
  • Spray paint, if needed
  • Painter's tape, if needed
*Note: Make sure the plate and candlestick are proportional so that you don't have any tipping misfortunes!

Directions:
  1. Start by painting your candlestick. I used painter's tape to cover the pretty glass piece on my candlestick. I then spray painted two coats of gold paint.
  2. After paint dried, I took a hot glue gun and generously used the glue on the top of the candlestick before carefully securing the plate on the top.
  3. Add extra glue as needed and allow to dry.


Tuesday, April 22, 2014

Baileys Cupcakes

This weekend we celebrated my brother's 21st birthday as a whole family. My sister was home for Easter and we were tasked with making the birthday dessert. Naturally, as us Brickweg women often do, we got completely carried away. We made not one but three kinds of cupcakes (the other two recipes will come at a later time)!! But the all time fav of the three by far was the Bailey's cupcake. It was perfectly fitting for a 21st birthday and the frosting was out of this world! I could have eaten the frosting with a spoon, but I resisted. Also, these cupcakes were made from scratch and we can all fully attest to the fact that homemade is better than a box. These were incredible and we can't wait to make another batch soon!

Coffee Chocolate Cupcake

Ingredients:
- 1/2 tsp baking soda
- 1/2 c buttermilk
- 3 heaping tbsp cocoa
- 1 stick of butter
- 1/2 c coffee
- 1 c sugar
- 1 1/4 c flour
- 1/4 tsp salt
- 1 egg
- 1/2 tsp vanilla

Directions:
1. In small bowl, dissolve baking soda in room temp buttermilk.
2. In sauce pan, melt butter and cocoa together at low temp. When smooth, add coffee.
3. In separate bowl, sift together sugar, flour and salt. Add cocoa mixture and egg and mix at low speed.
4. Add buttermilk mixture and vanilla and beat until smooth.
5. Bake at 350 for 20 minutes.

Baileys Irish Cream Frosting

Ingredients:
- 1 stick of butter
- 4 c confectioner sugar
- 1/4 c Baileys
- 1 tbsp milk
- 1 tsp vanilla
- 1 tbsp coffee

Directions:
1. Beat ingredients together until smooth.
2. Pipe onto cupcakes while still room temp. Use plastic baggie with cut corner to pipe onto cupcakes smoothly.

Monday, April 21, 2014

Froggy Birthday Party

Hip Hop Hooray! Time to celebrate somebody special's Birthday!

A birthday party designed for little ones who are in love with those green amphibians or in my nieces case, blue poison dart frogs.  For my niece's 3rd birthday party she wanted a party dedicated to blue frogs, and her of course.  Since it was a small family party with few kids we didn't use all these ideas, but I came up with some great additions and have all the details to have you throwing a frog party your child and guests will love.

Colors:  Blue and Green

Attire: (Optional)
-Could ask guests to dress in green like frogs
-Could supply frog masks, also serves as guest favors

Decoration:
-Lay lily pads leading up to the door either using construction paper or chalk on the driveway.
-On the entryway door hang a welcome sign that ties in the party theme. Example:
Welcome to our Pond
(Include a picture of a frog with a birthday hat)
We're Celebrating (name)'s (age) Birthday
-Can make frogs out of balloons and construction paper then hang them around the party.
-If your child is a fan of Sesame Street you could incorporate Kermit the Frog.
-Decorate using blue and green colors

Food:
Snack- "Bugs on a Log" celery, peanut butter, and raisins
Meal Ideas- Play around with pasta in "log" shapes, and side of blue jello as a pond.  If feeding adults too you represent lily pads by making salad cups.  
Dessert- Decorate your cake or cupcakes with blue icing to mimic a pond.  Top the cupcake with a "log" or tootsie roll and a fake plastic or rubber frog.  For younger ones, a green lily pad out of icing as the decoration will suffice to avoid choking hazards.   


Games:
To get them pumped up (more than they probably are already) and give them something to do while the guests arrive, you can play children's songs like the "Little Green Frog Song" and have them leap frog or singalong.
 
Pin the Frog on the Lily Pad 
The concept is the same as any pin the tail game.  Using a bandana you blindfold the participant, spin them around and they have to guess where on the wall the lily pads are located to tape their frog to it.  Winner is whoever lands on the pad most accurately.  

Materials and Assembly:  
-Frogs: Using a frog template print off frogs for the number of guests.  Can color ahead of time (which I did) or make a coloring activity out of it and have each guest color a paper frog to their liking.  To distinguish the birthday boy or girl I made a small paper birthday hate for one frog.  And since in the case of my niece she loves blue frogs she got a blue frog and pink birthday hat.  
-For the scene you can make it as simple or elaborate as you wish.  Because I wanted to make the lily pad size accurate, I made 2 pads.  Then decorated the scene with flies and dragonflies I cut and colored.  
 
Flies for Froggy
Dropping clothes pins and trying to make it in a bucket is a game I played in my childhood.  Adapting the game to this theme was easy.  Game is a cinch to play, just have kids kneel or stand on a taller surface and they drop their pin, trying to make it into the bucket. 

Materials & Assembly:
The bucket becomes a frog which you decorate to look like a frog, with the opening being the frogs mouth.  To make simply find a canister or jug, make sure the hole is appropriately sized for age of kids, and make it green.  Use green construction paper to cover it or painting it's an option.  Make some eyes or large googly eyes and finally a red/pink tongue coming out of the canister and over the lip of the opening.  For the flies you can make them multicolored for dragonflies or all black representing the everyday fly. 
 
Frog Race -  
Don't worry you're not racing real frogs, that could get disastrous!   For the frog race you need a "Frog Jump Game" which you can get at Party City for $4.99.  The game is made for ages 3 and up with 24 frogs included.  Guests choose a frog color and race to get their frog to jump in the "pond" or blow up pool.  Can start on one side of the room OR in a circle surrounding the inflatable pond.  Press and release a tab at the rear of each tab to make it spring forward.  The player landing the most frogs in the pool wins.

*Note: Play on a hard surface otherwise your frogs will do lots of back flips.  And although impressive, the goal is to have your frogs move forward. 


With these ideas in combination to your own, you're sure to throw one Hoppin Happy Birthday that any child would be happy to have!


Friday, April 18, 2014

Mini Carrot Apple Muffins

Lately, my family has been on a health kick. As more people become gluten free, dairy intolerant and as food allergies increase, there are some great recipes out there for alternative and truly healthy foods.

My mother tried this recipe recently and even the boys in the family enjoyed it. You can either make these as full sized muffins or as smaller minis. The recipe called these "cupcakes" but we couldn't bring ourselves to call them that. But they are tastily perfect for breakfast or an afternoon snack with some fruit. 


Mini Carrot Apple Muffins 
Ingredients: 
- 1/2 cup of all-purpose flour
- 3 tbsp of almond flour (if nut allergy, can substitute flour)
- 1/2 tsp baking powder
- 1/2 tsp ground cinnamon
- 1/4 tsp salt
- 1 large egg
- 2 tbsp frozen apple juice concentrate, thawed
- 2 tbsp plain nonfat Greek yogurt
- 2 tbsp canola oil
- 1/2 tsp vanilla extract
- 1/3 grated carrot
- 3 tbsp dried currants
- 6 tbsp nonfat honey flavored Greek yogurt

Directions: 
1. Heat oven to 350F and line 12 mini muffin cups with baking cups. In a bowl, whisk together the flour, almond flour, baking powder, baking soda, cinnamon and salt.
2. In another bowl, whisk together the egg, apple juice concentrate, plain yogurt, oil and vanilla. Stir egg mixture into the flour mixture; add carrots and currants, stirring to combine.
3. Fill each baking cup with 1 tbsp of batter. Bake 12 minutes or until toothpick inserted into muffin at center comes out clean. Cool in pan for 5 minutes and then place on cooling rack to complete cooling.
4. When ready to serve, top muffin with honey flavored yogurt.
*Note, we found that muffins are best stored in plastic container shortly after coming out of the oven to keep moist.

Makes: 12 servings
Per muffin: 76 cal (2g protein and 1g fiber) 

Thursday, April 17, 2014

Holy Thursday at the Vatican

On Holy Thursday back in 2010 I was lucky enough to be half around the world, and even luckier to be at the Vatican.  But what makes my tale even better is the fact that I was at the Vatican, in St. Peter's Basilica, listening to mass in Latin, led by Pope Benedict XVI.  How cool?!  I can hardly believe it myself.  But it was no easy task to experience this once in a lifetime opportunity.  

A few of my study abroad travelers on our spring break trip to Italy, decided it was well worth an early morning during our 3 day Roman visit to try to go to mass at St. Peter's Basilica.  Plus, how many times can you go to mass at THE CHURCH that outranks all churches?  We transported to Vatican City and were waiting in line to enter the Basilica.  It didn't take us long to notice there were a lot of religious personnel there...not many lay people.  A little nervous and uncertain about our plan we nudge along in line.  Soon we realized they were asking for tickets...yeah we didn't have tickets or a clue how to get them.  Trying to find someone who could explain how they obtained a ticket, in English, wasn't easy.  Now worried and intimidated as the Swiss guards increased in number the closer we got, we figured right now is as good a time as any to break out in prayer and that maybe it'd reach God faster considering where we were.
Eventually the guard put his hand out for tickets.  trying to explain in a mix of English and Spanish, hoping some choice words would translate into Italian, they moved us aside.  Hoping the Holy Spirit would grace us with the ability to speak in their tongue, another guard approached...still a language barrier.  Finally another who could get the gist of our predicament approached us.  Clearly we must have looked innocent, with nervous energy bubbling.  Out pleas of only being in town for 2 days and badly wanting to celebrate Holy Thursday must have come across.  That and our pleas to God to not let us get arrested (ya never know) and allow us to participate in mass.  So the guard helped us bypass the others, and we were IN!   

With programs in Latin and Italian, as well as our own religious mass experience we were able to understand most of the mass.  It was unbelievable being surrounded by nuns, deacons, priests and a few other lucky fold.  We were seated in the back, but seated anywhere in St. Peter's was better than seated out in the square and watching the mass through a broadcast.  To be in the basilica when all the bishops and cardinals entered and the pope himself is
on my list of coolest experiences. There was something ultra special about celebrating a hold day, particularly a day before Christ would rise that was the icing on the cake.  
 
I'm so glad I sacrificed sleep and didn't wimp out when we didn't have the necessary credentials, I was very ready to high tail it right outta there at any moment.  But it all worked out and God answered our prayers.  I got to see the pope in person and attend the most renowned church in the world.  Pretty hard to top that Holy Thursday, but I got the pictures and most importantly the memories to relive it every chance I want.  

If you're ever traveling in Europe around this holy time plan on detouring to the Vatican and experience a mass at St. Peter's, it's such a great adventure and truly is unforgettable.

Wednesday, April 16, 2014

Little Man : Baby Shower

My cousin Leah and her husband are having a little miracle baby. I don't know that I have ever seen a future mommy as happy as my cousin is. It was a bit of a rough journey to get to this spot for my cousin and her husband and as a result, they haven't taken much of pregnancy for granted. Leah literally glows. She is so excited about every little moment in her pregnancy and is quick to laugh, even at the not so glamorous pieces.. like her "cankles." Their little guy will be incredibly loved and totally spoiled by his parents, grandparents, and godparents. Our entire family was ecstatic to hear the news and now we are all waiting on his entrance into the world in May.

While the baby is growing, we took some time to honor Leah and to finally be able to throw her a baby shower! My cousin Brianna took on the task and did an amazing job. Between the extremely happy mama-to-be and the cute touches that Brianna put together, it was a success. With Brianna's permission, I had to share her genius ideas!


Leah's Little Man Baby Shower


Start with a matching color scheme. Brianna used black, blue, green and a striped pattern.

Decor:

- Garland made up of matching colors and paper reading, "Little Man"

- Wooden blocks that made up the baby's name

- Garland with baby onesies. I love this! The onesies had suspenders, ties and a mustache

Food:

- Munchies! Veggies, fruit and appetizers work well

- Chocolate mustaches on a stick. Brianna used a plastic mustache candy mold and then refrigerated the
chocolate.

- Cupcakes with coordinating picks reading, "Little Man" and "It's a boy!"

Games:

- Guess the mustache. Because don't you know the difference between the Super Mario mustache and a cowboy mustache?

- Don't say baby. Each lady started with two clothes pins. If you said "baby," whoever caught you could take a cloths pin

- Wishes for baby. Not as much a game but each lady filled out a card full of wishes for the future
kiddo

Little Touches:

- Striped straws with "Little Man" flags

- "I am wonderfully made" onesie that each lady signed for the baby

- Baby diapers that all had little notes from different ladies. Things like "Good thing I'm cute!"

Drinks:

- Baby bottles with "It's a boy!" ribbon on the top and blue tropical punch inside

- Water bottles with the matching paper and mustache reading, "Wet your whiskers"

- Little champagne bottles for prizes! Each read, "She's about to pop!" along with the due date


Brianna gave us future-shower-hosts a lot to live up to! She did a wonderful job and we all had so much fun. Can't want to meet little baby Joey!


Tuesday, April 15, 2014

Eggplant and Gold!

Sometimes it is a struggle when you have ideas and plans. And then those ideas become the trendy, popular thing to do. And all of a sudden, you are faced with a choice.

Do you do the things you want because you have always wanted to? Even if that looks like you are following the crowd? Or do you do something totally different for the sake of doing something different?

This was my recent thought debate surrounding wedding colors. I have wanted to use purple in my wedding for years. I watched as pink was the color of choice, then malibu blue was in style, then navy and then this fall and summer came purple. For me, this development felt like... ouch, really? Well, after much thought and support from those closest to me, I decided that I didn't just want, I needed to do the colors I had always dreamed of.

Therefore, in the honor of sticking to your guns, I did a couple purple related projects!!

Paper Roses
Spoiler alert! You may be seeing this fun little piece somewhere on my wedding day. These
little beauties were easy once you did one or two initially. I saw a number of tutorials where the end result was an entire bouquet. Beautiful and added bonus, very affordable!

Supplies:
- Card stock paper in varied colors and patterns
- Glue gun
- Scissors
- Canvas or other base piece

Directions:
1. Begin by cutting circles. I cut different sizes so that my roses were different sizes. Then cut a spiral in the circle. I preferred my roses to not have perfect edges but if you want perfect edges, cut your spiral edges in the same length.
2. Begin wrapping your rose from the outside edge of the spiral and twist into the center.
3. Glue as you go but ultimately, glue the paper together at the end.
4. Position roses on your canvas as desired. I used a burlap canvas, one of my new favorite things! Or you can paint a background or image or even just fill on the back of an empty picture frame.

Yogurt Drops
This little purple project was something that I had on my "to do" list for months. Since I gave up sweets for Lent, I decided to try these frozen yogurt drops. I used blueberry Greek Chobani yogurt. These are perfect since they trick you into thinking that you are eating something with an ice cream texture without all the added sugar. 

Supplies:
- One or two small containers of Greek yogurt
- Plastic baggie
- Wax paper

Directions:
1. Spoon yogurt into baggie.
2. Cut corner of baggie and slowly pipe yogurt onto the wax paper. I did quarter sized dollops.
3. Freeze immediately.

Chobani also has a delicious looking recipe for "Honey Chobani-Covered Frozen Blueberries" on their official blog. Yum!!

Cardboard Art
Lastly, the other project that has been in my sights for awhile is a cardboard roll art piece. I grabbed an old wrapping paper roll and in honor of our accent color, I sprayed the end result in a beautiful gold.

Supplies:
- Cardboard rolls (wrapping paper or toilet paper rolls work well)
- Hot glue
- Scissors
- Spray paint

Directions:
1. Cut cardboard rolls into desired widths.
2. Hot glue edges of cardboard into the design and pattern that you choose. I glued together groups of four by connecting them at the center.
3. Glue the remaining pieces to complete the size and design. Spray paint and let dry.

Thursday, April 10, 2014

Sand Unity Ceremony

Sand Ceremony in Family Wedding
The popularity in weddings of the sand unity ceremony continues to grow!  If you haven't attended a wedding ceremony with a sand unity portion incorporated, you surely will at some point.  I myself have had the chance to participate in two weddings using the concept! Couples love the symbolism the sand represents and enjoy the fact that they get a unique memento to forever display their love. 

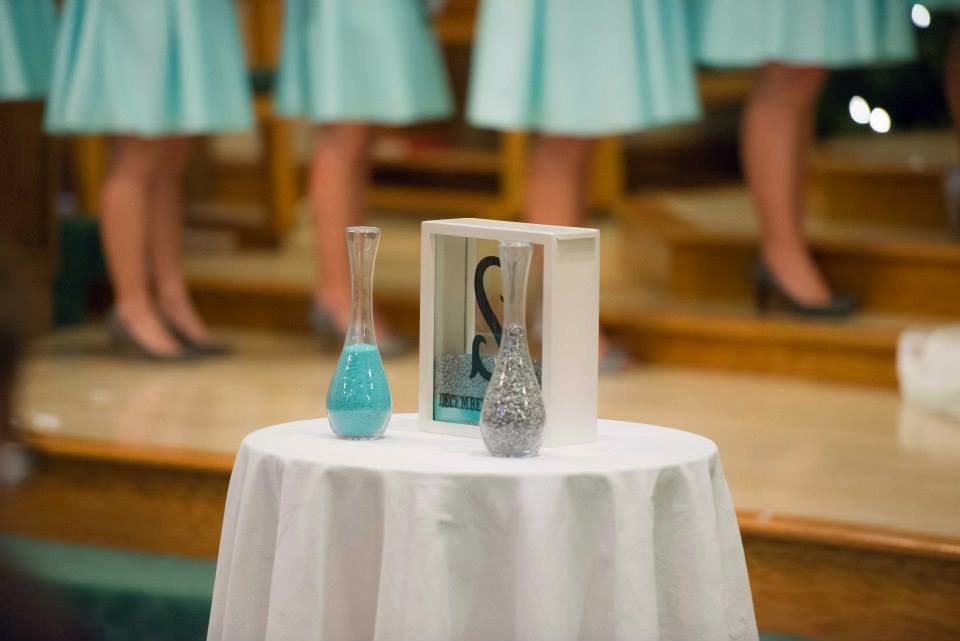
The process of the sand ceremony is simple.  It features two containers that are filled with two different colors of sand, usually the wedding colors.  There are a variety of containers you can choose from.  In the weddings I attended, they used a box and the other a glass vase; both decided to have the container etched with the wedding date and their names.  The container can be empty or filled with a base layer prior to the start of the ceremony.  Some versions of the sand ceremony have the priest or officiant pour in a neutral color of sand to represent God's presence in the couple's unity.

The bride and groom take alternating turns pouring in the color of sand they have chosen to represent themselves  Usually while the couple pours someone will share a short reading or statement about the significance of the combining of sand.  And there you have it! A great piece of your wedding, which can be displayed anywhere in the home and serve as a special reminder of that day and the many more to come in the marriage.

It's the symbolism that has really sparked such an interest in the sand ceremony.  Unity candles have dominated weddings for quite some time due to their own symbolism of the couple coming together to become one.  Candle ceremonies are great too, and also allow you to keep the unity candle as a keepsake.  But a lot of couples are leaning towards the sand due to the durability (candles don't do so well in wind), and the way to add their own personality to the keepsake through choice of sand colors and the container.
Sand Unity Ceremony in Friend's Wedding

It's hard to not like the symbolism of the sand ceremony.  The different colors representing the bride and groom which combine into layers of color, demonstrating that each individual has still retained their own identities and personalities.  But, if you take a closer look it is virtually impossible to pinpoint where each layer begins, that the grains of sand can't be truly separated.  I think that's pretty powerful stuff.  And apparently so do others.  What a wonderful representation of the "two becoming one," an idea that continues to resonate with couples.

This new trend of the sand unity ceremony becomes a colorful keepsake that serves as a powerful reminder of the unifying of the couple on their wedding day!

Wednesday, April 9, 2014

Best Burgers in the Twin Cities


My other half and I are huge fans of burgers. I know, that is right up there with our other unhealthy favorites, pizza and french fries. We have tried many different burger restaurants and a few weeks ago, Joe looks up at me and says, "You should review some burgers on your blog!" One of the many reasons I am marrying him folks. Keeper! While we have not nearly exhausted trying burger joints in the Twin Cities, we do have a few recent favorites. I have reviewed a couple "quick" style burgers that you can get on the go and then the "sit-down" burgers that are worth the wait. In anticipation of writing this, I did a little research and realized how we have barely skimmed the surface of the TC's top burger winners. Who knew that the Twin Cities was such a hub for amazing burgers?! We will definitely be adding to this list as we try more!


Burgers that are a "Quick" bite on the go!

Smashburger

You have probably heard the commercials for "Smashburgers' burger smashers!" We were a bit skeptical about this place since it seemed like just another fast food restaurant. But since it had so many raving reviews, we wanted to try it and were pleasantly surprised! The burgers are never frozen 100% Angus beef with an artisan bun and very tasty. Try it with Smashfries which are tossed with garlic, rosemary and olive.

5 Guys

While I can never finish a burger and fries here, it is still yummy. I definitely recommend splitting a meal with someone and since there apparently are "250,000" different ways to order a 5 Guys burger, it'd be beneficial to not try them all at once!

Burgers that are "sit-down" and worth the wait

Burger Jones

Joe and I recently discovered this place and while some people love it and some don't find it terribly interesting, we took to it right away. That also might have something to do with their delicious and very adorable mason jar drinks. My most recent taste test was their Gyro burger. While it can't beat Gardens of Salonica gyros (more on that later!), it was a great lamb burger topped with tomato, lettuce, feta, cucumber and tzatziki sauce all on a flat wheat bun. Joe thoroughly enjoyed his beef and bacon burger as well. The branding on the top is a fun touch.


5-8 Club

I recently had my second trip to the 5-8 Club. We joined Joe's brother Josh and his lovely girlfriend, Tami. The 5-8 Club is unique in that it is seat yourself. The line was out the door the entire time that we were there! I tried a Juicy Lucy with pepper jack cheese inside and it was incredible. If you don't know what a Juicy Lucy is, just think about a perfect burger patty with the cheese inside of it! We are now on a quest to try the other top Juicy Lucy restaurants in the Twin Cities to compare: Matt's Bar, The Blue Door Pub and The Nook.

Bar Lurcat

My girl Meghan took me to Bar Lurcat for my birthday. My first time at this restaurant was for a work event so I hadn't had the pleasure of trying their traditional food menu yet. Their mini burgers were amazing! They reminded me a bit of the renowned 112 Eatery burgers that come with just a patty and an English Muffin. These little burgers melt in your mouth and I was very thankful to have Meghan there to help me eat them. We topped it off with an order of mini donuts and I was a happy camper. Pair it with their Eiffel Tower Sparkle cocktail and you have yourself a party!

Tuesday, April 8, 2014

DIY Bridesmaid Boxes


Creative ways of asking friends and family to be a part of your bridal party is most definitely a new trend that is taking off. Just like a Save the Date is not on the traditional "to do" list, asking a sister to be your bridesmaid or maid of honor in a unique way is also a recent addition. I can't say that men have picked up this trend but I saw a few ideas for my girls and ran with it. Since a few of my ladies live out of town, I wanted to do something other than just a phone call that they would have surely expected. Plus, it was an opportunity for a little creativity.

I started with a few of my Birchbox boxes for the out-of-towners and a few other boxes for the in-town ladies. I used a sticker for the outside that read: "J&L" with our wedding date. I switched up the quotes so that each was different. For example, one read, "I can't say I do without you!" or "I have my mister but I always need my sister." On the inside was written, "Now it is my turn to pop the question... Will you be my bridesmaid?"

I made a bracelet or set of earrings for each girl, different depending on what I thought they would like. Along with the jewelry was a ring pop, which many of you have probably seen on Pinterest. The girls loved it and it was a special way to ask each to be a part of our wedding day. Of course, each box had a card that formally asked each lady and said thank you for being a wonderful friend/sister.

It was a blast to receive calls after sending the boxes and a fun way to officially kick off the bridal party festivities!


Monday, April 7, 2014

Penne with Brown Butter, Arugula & Pine Nuts

Penne with Brown Butter & Arugula
I'm an avid watcher of Giada's show on the foodnetwork, Giada at HomeI saw her cook this recipe and it seemed an easy delicious dish. I'm not alone in this thinking, since she has a lot of other positive reviews on this recipe.  You can even watch the video on her foodnetwork page.  Since arugula is a huge component of this recipe you have to like this zippy peppery herb.  Arugula has a surprising effect that's unexpected, and the healthy components makes it worth it.  And the toasted pine nuts add that extra touch. Depending on your family's taste buds this might make a better dinner just for adults, but expanding food horizons is always good.  This recipe definitely makes an easy weeknight meal! A good one to try this spring or summer as the fresh items fill our markets.
 
By: Giada De Laurentiis
Serves: 4-6
Time: 20 minutes

Ingredients

Dressing:
1/4 cup EVOO
1 large lemon, zested & juiced
2 tsp salt
1/2 tsp ground pepper

 Pasta:
1lb penne rigate pasta
1/2 stick (1/4 cup) unsalted butter, room temp
4 cups baby arugula
1 cup cherry/grape tomatoes, halved
1 cup grated Parmesan
1/2 cup toasted pine nuts
2 tbsp capers, rinsed & drained

Directions

1. Dressing: In a small bowl whisk olive oil, lemon juice, lemon zest, salt and pepper til smooth. Set aside.
2. Pasta: Bring a large pot of salted water to a boil over high heat.  Add the pasta and cook until tender but still firm to the bite, stirring occasionally, 8-10 minutes.
3. Drain and serve about 1 cup of pasta water.
4. In a skillet whisk butter over medium heat until melted.  Simmer until foamy.  Continue to cook until the butter has a nutty aroma and turns caramel, 3-5 minutes.
5.  Remove pan from heat. Add he pasta, dressing, arugula, tomatoes, Parmesan, pine nuts and capers.  Toss until coated, add pasta water 1 tbsp at a time to loosen sauce.  Transfer to large bowl.

Note: Pine nuts bake 350 degrees, toasted 6-8 minutes on sheet. Cool.