Tuesday, February 18, 2014

Crash Hot Potatoes

Potatoes YUM! I could eat potatoes with dinner almost every night.  In the family I'm known as the potato lover.  At all the big meals I'm always the one to request a potato dish.  The variety of recipes you can make with potatoes are numerous, but there are always a few classics that find their way to our table. I tend to lean towards the simple when it comes to potatoes.  

A spin off of baked potatoes, these crispy small taters were devoured at our Christmas Eve meal.  Smaller than a baked potato, you can eat the whole thing instead of digging into the meat of a baked potato and being left with the skin. It's an easy side to make with minimal ingredients, yet still scrumptious. 

We kept it simple and added cheese on top of the potatoes, but feel free to douse them with bacon and sour cream too.  Mmmmm, I'm salivating just thinking about it.  I think this potato recipe has to definitely be added to my "Marie's Top Potato List"! Maybe it'll make yours?

 
Recipe by: Ree Drummond
Prep Time: 30 minutes
Cook Time: 25 minutes
Servings: 6

Ingredients:
12 whole Small Round Potatoes
3 Tablespoons Olive Oil 
Kosher Salt
Black Pepper
Herb Of Choice (Opt)

Directions:


Monday, February 17, 2014

A Presidential Memorial


In honor of President’s Day I thought I would focus on our most loved presidents.   Of the 44 United States Presidents we’ve had it can be difficult to arrange an order of favorites.   How do you order them when they all faced such different situations when serving our country?   Historians may disagree over an exact order, but there are a few clear favorites when it comes to those that lead our country.
 
My all-time favorite is Abraham Lincoln, a popular first choice for many.  I LOVE Lincoln! Any Lincoln paraphernalia I snatch up.  I got loads of books on Honest Abe and finally I could enjoy a good Lincoln movie during my lifetime, Daniel Day Lewis sure made a good Lincoln in my opinion.  

But President’s Day is about celebrating more than one president.  So with that in mind I’d also pick Teddy Roosevelt, who seemed so different than the typical president and intrigued me with the stories surrounding him in the history books.  And of course George Washington is typically at the top of lists for a favorite president.  As a founder of our nation, showing bravery on the battlefield, and smarts in office, it’s hard not to respect a man who guided our nation and set a precedent of when to step down.  And finally a fourth favorite among the 44 is typically Thomas Jefferson who had an integral part in drafting the Declaration of Independence, securing land to extend the United States’ power and creating a strong foundation for future generations to look back on.  


If you haven’t already guessed it, these are not only four of MY favorite presidents.  These four leaders of our nation have not only secured their place in our history books, but also in a hillside.  One of my favorite monuments honoring our past presidents, carved into the side of the Black Hills of South Dakota is Mount Rushmore.  This National Memorial is visited by nearly 3 million people a year who wish to marvel at the astounding man-made creation carved into nature’s creation.  When you stand at the base of this gigantic memorial it is hard not to be amazed.

http://www.nps.gov/moru/photosmultimedia/index.htm

"The purpose of the memorial is to communicate the founding, expansion, preservation, and unification of the United States with colossal statues of Washington, Jefferson, Lincoln, and Theodore Roosevelt."
Gutzon Borglum

Clearly I was not the only one to think that these were the best of the best in regards to our presidential leaders.  Even back in grade school when I visited this memorial on a family vacation I was captivated.  I'm looking forward to returning with my own family one day.  At first glance you might be thinking whoop dee doo, faces in a hillside isn’t all the impressive.  But when I said this memorial was huge I wasn’t exaggerating.  Curious about the size of the faces that grace the hillside, here are all the measurements that make up the enormity of the memorial. 


Mount Rushmore and the Avenue of Flags
Heads: 60 feet.
Nose: Washington’s is 21 feet the rest are approximately 20 feet.
Eyes: 11 feet wide.
Mouths: 18 feet wide
 

It’s not just the size that makes it impressive, although that’s a huge part of it; it’s the history behind the construction and the men it was dedicated to.  Check out more on the National Park website and plan a visit to Mount Rushmore to see it in person.  The photos truly don’t do it justice.  You’ll enjoy learning more about these four men, and you don’t have to be a history buff to enjoy it.  Learning about the construction, and the details and tools that went into perfecting the memorial will interest artists, mathematicians, teachers, kids, and touch anyone who is proud to be an American.  It seems only right that on this President’s Day we look back at four men that deserved a spot on Mount Rushmore and honor the lasting impact they had on our nation.  

P.S. I found those bobbleheads on the National Park website.  I mean look at these things!   Great gift ideas.... But I might have to treat myself and get a Lincoln, but the Teddy Roosevelt is mighty nice too.  Too many choices!   

Which president will get your head bobbing?


Friday, February 14, 2014

"I love you because..." Message Frame

In lieu of Valentine's Day this seemed the perfect craft to feature.  What a great time to promote sharing love with one another.  This frame doesn't only have to be displayed during February.  In fact it should be available to use all the time! Who doesn't love a surprise cute message from their loved one.  Especially for those of you out there who believe Valentine's Day has only been elevated to market cards, flowers, chocolate and jewelry, an "I love you because..." board allows you to share your love all year round, and it barely costs a thing.

I love our message frame! I'm totally one of those people that get a thrill out of leaving little love and appreciation notes for my friends and family.  After seeing this idea from Life Sweet Life Blog I had to make one.  My husband and I frequently write messages on it, about 5 days or so I'd say.  Our messages switch between humorous and sentimental.  It's just a simple, 30 second way to share your appreciation for your partner.

 
Whether it's "I love you because...you woke up early to scrape the car off," or "I love you because...you give me your left over Chipotle," everyone loves to feel appreciated. 

 
Materials:
*Scrapbook Paper & Letter Stickers OR Printable Template
*Frame
*Erasable Marker

You can easily make your own to fit your style of decor.  Maybe you want to make more of a holiday version by using red and pink colors, or heart paper to fit a Valentine's Day theme.  However, if you want it to serve as everyday decor the printable templates from Life Sweet Life are easily accessible and print nicely.  She has 5 colors to choose from with a chevron background.  Also, easy to convert to the size frame you wish to use.

You can share this with not only your partner, but your whole family too if you'd like.  Parents maybe you'll get a message from your kids surprising you with their gratefulness.  You can always hope. These also make great additions to wedding gifts to encourage the couple to share their love with one another.  You can even write a message to the couple on the gift.  So share the love.

Make yourself and your spouse, or boyfriend/girlfriend, an "I love you" message board.  It makes a sentimental gift that anyone can pull together.  

Take it upon yourself to spread the love and you're sure to get some back.

Thursday, February 13, 2014

Weathered and Worn : Rustic Themed Wedding

I have helped numerous brides in some way, shape or form before they get married. I was a bit afraid that these past experiences would taint the joy of planning my own wedding. But thankfully, I couldn't have been more wrong. I am loving just about every minute of it as I finally get to put touches on a day that perfectly fits Joe and me! Be forewarned in advance that we are going to be blogging a decent amount about wedding ideas and fun this year. I know blogging will be an outlet for my ideas and also for all the creative inspirations that I wish I could incorporate. I mean seriously, Joe and I could have 10 weddings and I would never run out of color schemes, decorations and creative thoughts for each day. And I know Marie has a head full of ideas from her own wedding in 2012!

One of the most popular wedding styles today is having a rustic wedding look. While this isn't the route that we chose for our big day, I couldn't resist writing about it since there are endless amounts of cute ideas out there. If you are already married, you could use this theme for a birthday party, summer barbecue or an anniversary celebration. Since the rustic look is popular, you can find some great items at craft stores for at very affordable prices. The main ingredients for a rustic look are mason jars, burlap, wooden chalkboard signs and more mason jars.

Decor:

  • Incorporate wood into the centerpieces to help create the perfect visual. You could use
    round wooden tree slabs or come up with some creative words for each table with scrabble pieces.
  • Mason jars are perfect for tea lights or floating candles. Add some twine or ribbon on the lip to spruce them up even more. If you browse Pinterest or are a DIY freak like myself, you can't help but come across hundreds of ideas for mason jars. Check out some more awesome ways to use these popular jars here.
  • Burlap table runners bring the look together and are easy to find. Michael's and Walmart sell whole spools of burlap or find some runners on craigslist from a former bride.
  • Using flowers in a rustic wedding look helps to make guests feel like they are fully immersed in the farmhouse, summer fields and shabby chic vibe that you are going for. Fill a few mason jars or bud vases with some wild flowers throughout the ceremony and reception space. You could even wrap the bouquets with some burlap ribbon or twine.


Creative Touches:

  • Another rage these days is chalkboard paint. You can turn any surface into a chalkboard with a bit of this magical stuff. Grab some old serving trays, frames or wood pieces from around the house or a thrift store and give them a quick coating. These make for sweet rustic signs for your beverage table, dessert table, menu or the schedule of the evening events. Or for your photobooth like my cousin had at her wedding, pictured at the top of this post!
  • Weathered, old or refurbished wood pieces are perfect for hanging a "Mr&Mrs" sign on the back of the bride and groom's chairs, to point out directions to the reception area or as sweet sayings around the reception space.
  • Twine is inexpensive and makes a sweet little clothesline look with pictures of guests or for name cards. Hang in different layers to fill the space and give your guests something a fun visual display. Some couples ask that guests replace their name card with a picture of themselves or a fun note for the bride and groom's future guestbook.


Wednesday, February 12, 2014

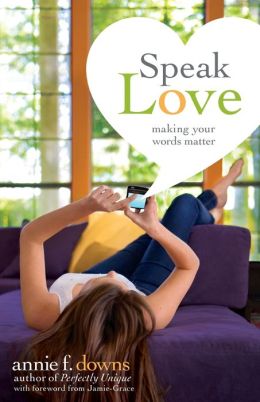
Speak Love - Making your Words Matter

Author: Annie F. Downs

A book written for teen girls, it's the perfect book for junior and high school aged girls, although it speaks to all women.  The focus is to speak love because words kill, words give life.  The author writes in a vernacular that would be easily picked up by teen girls, and makes the book a conversation between herself and the reader.  Her point is that all of us at some point have hurt or been hurt by words and it's time to change.  With a perspective focused on God, she discusses how we should aim to be, all the while being realistic of how we actually are.

There is a lot of attention nowadays on bullying, but sometimes the message still doesn't reach the teens.  This book is another attempt by an author who battled similar struggles trying to share her message.  Annie Downs is down to earth and easy to relate to.  Bullying can be something we're too embarrassed or ashamed to share with others, and this book offers another avenue for reflection.

A plus about this book is she gives you the chance to reflect or journal at the end of the chapters.  She has you consider what she's shared, with your own thoughts and opinions on the matter.  To help you reflect and get on track, she lists Bible verses and also questions to jump start your thinking.  And finally a challenge that asks you to use your words to speak love.

Example: 
In 1st chapter she has you look at
Joshua 4-5      Proverbs 18:21      John 1:1          2 Corinthians 5:17

Questions:
1) What part of using my words well do I find most challenging?
2) How do I want to be different after reading this book?
3) When can I remember someone being unkind to me with words?

Challenge:
Tell someone you are reading Speak Love and tell them why.  Just let someone else know why this book and this topic are important to you.

*So here is me meeting that challenge, as I share this book with you.  We've all experienced this and continue to see it.  So let's be better both for others sakes and our own.  Let's try and Speak Love.

Tuesday, February 11, 2014

Strawberry Cheesecake Cups

As I have mentioned previously, I am a dessert fanatic. But my future husband could care less about sugar most of the time and would rather have another slice of bacon or another piece of steak. So weird, right? Thankfully for me, he does have a few different sugar weaknesses: cheesecake, ice cream cake and Oreos. I am working hard to perfect a few variations of his favorite desserts to have on hand for future occasions.

What originally started as a recipe similar to my banana split bites, ended up turning into fun little cheesecake cups. I made these for a friend's birthday and they were a sweet treat at the end of the night. The only thing to beware of is that they will need to sit in the fridge for a bit of time. So plan ahead!

Ingredients:
- 1 box of no bake cheesecake (If you have time, home make the cheesecake)
- 1 package Graham crackers, crushed
- 2 tablespoons sugar
- 5 tablespoons butter, melted
- 1 package fresh strawberries, sliced
- 1 package strawberry sauce (If you have time, home make the sauce)
- Mini cupcake pan, 24 count
- Non-stick cooking spray
- If transporting, small paper or plastic cups

Directions:
1. Prepare the crust by adding the sugar and melted butter to the Graham crackers. Spray cupcake pan before spooning crust mixture into the bottom of each cup. Press down for better results.
2. Follow the no bake cheesecake directions. My box had me add the mixture to 2 1/2 cups of cold milk. Mix on medium for three minutes until thick. Spoon mixture on top of the pressed crust.
3. Allow cheesecake to sit in the fridge for an hour.
4. Carefully spoon out each cheesecake and insert into paper cup or onto a plate. Surround each cheesecake with fresh strawberries as desired.
5. Drizzle strawberry sauce over the top. Refrigerate until serving.

Monday, February 10, 2014

Art : Lose Yourself to Find Yourself

Who didn't love art class? When you could to listen to music, whip out your creative side and forget your other studies.

I have always had a great love for art. It wasn't until after high school that I realized how therapeutic it was for me. There is nothing better than getting lost in a piece. The past couple years, I have tried to find time here or there to indulge in this hobby. It has provided some relaxing evenings after a stressful day and even some fun wedding gifts for friends.

Mediums of choice: pastel, colored pencil, pencil and charcoal

Pictured are a few of my favorite projects of the last couple years. If you enjoy art in the least, I can't encourage you enough to indulge in it. Life gets busy and downtime may seem impossible. But it'll get you outside your head and might even produce a wall-worthy piece of art!

If art is not your forte, check out a local Wine and Canvas type event. These events have intructors who walk you through each step of a specific piece. I've had a number of friends attend one of these nights and the final results produced are always beautiful! 

"Art enables us to find ourselves and lose ourselves at the same time"


Thursday, February 6, 2014

Wedding Day Survival Kit

The concept of personal attendants and ushers in a wedding is an interesting contrast, especially since the roles are seen as similar. Ushers usually dress the same, are in some of the pictures and other than escorting guests down the isle, have a pretty easy job. Personal attendants, however, don't dress the same, are not typically pictures and run around like crazy people the majority of the wedding day. Some think that being a personal attendant means that you didn't quite make the bridesmaid cut. While this may be true for some brides, I have found this to not always be the case. For many brides that I know, your personal attendants are the people in your life that you can always rely on when you need something and/or are just trustworthy and calm spirited.

The first time that I was a personal attendant was for Marie's wedding and it was an amazing experience. My co-attendant was our cousin Cathy. Because the three of us have been best buds since we were babies, we know each other's strengths and weaknesses very well. Getting to be with Marie all day, at her hair appointment, putting on her veil, keeping her hydrated, carrying her dress and sending her down the isle, helped the wedding day take on a whole new perspective. Any bride should appreciate it, even though you may have to get a little dirty (literally) or make things happen behind the scenes that you will never get credit for.


All this being said, whether you are the bride or the personal attendant, it is always helpful to be prepared for the big wedding day. From past experience, below is my own list of must haves for the Bridal Survival Kit. Or as the maid of honor for a friend's wedding called the kit, "Keep Calm and Marry On!" 

Needed: Basket, Rubbermaid or container that's easy to carry

Supplies:
- Band-Aids and/or first aid kit
- Bobby Pins
- Hair spray
- Hollywood/fashion tape
- Feminine products
- Advil or pain meds
- Gum or mints
- Kleenex
- Baby wipes or tide to go
- Lotion
- Granola bars
- Deodorant
- One time use toothbrushes
- Nail file
- Safety pins
- Small sewing kit
- Water bottles
- Chapstick

Wednesday, February 5, 2014

Green Beans & Tomato Dish

A few years ago I confess that I would not have been eating this dish.  At best you might get me to eat a few bites.  I was one of those annoying picky eaters.  Luckily as I've aged I've come to at least tolerate and sometimes enjoy the occasional vegetable.  My theory is my taste buds must be dying, which is likely my body's coping mechanism to get me to eat more veggies.  Or, maybe not?  Any biologists out there want to toss in theories?

Anyways, I greatly enjoyed this green bean and tomato dish, probably because there was bacon and onion, yum.  We served it for a Thanksgiving side dish like the Pioneer Woman says she does for her family Thanksgiving.  The dish requires little attention once you get started.  A great side if you have lots of food to manage cooking. 

Another plus is it doesn't have too much flavor that it would detract or contradict the other components of the meal.  Bad thing is the juices, which make it good, run all over the plate into the other helpings.  I know some of you are cringing just thinking about that.  It was concluded that we liked the dish, but would enjoy it more with pork chops or chicken.  With those entrees the juice would only add to the flavor of the meat.  Definitely will serve this easy veggie dish again, perhaps just not on Thanksgiving.

Green Beans & Tomatoes Dish
Pioneer Woman

Servings: 10
Prep: 10 minutes
Cook 1 hr 10 minutes

Ingredients
-2 lbs fresh green beans, trimmed
-8 slices bacon, cut into 1 inch pieces
-1 large onion, chopped
-3 14.5 oz cans whole tomatoes & juice
-Salt and Pepper
-Cayenne Pepper

Directions
1. Add the bacon to a large Dutch oven and cook over medium heat until lightly golden.
2. Drain off the excess fat, and then add the onions.
3. Cook until the bacon and onions are golden brown.
4. Add the green beans and tomatoes to the pan.
5. Sprinkle in salt, black pepper, and cayenne pepper to taste.
6. Stir gently to combine, and then cover the pot and reduce the heat to low. Simmer for 1 hour.

Monday, February 3, 2014

Pandora Charm Bracelets

Every girl has owned a charm bracelet at some point in her life, especially since they are always in style and customizable to each individual. I have had a few different types of charm bracelets over the years. My most recent (and favorite by far!) are Pandora bracelets and charms. I was introduced to Pandora in college when the family that I nannied for gifted me a bracelet and charm for Christmas. They started my long love of Pandora which hasn't waned all these years later. Pandora has a wide range of bracelets in various materials, lengths, colors and prices. My personal favorite are the leather bracelets because they are subtle and gorgeous. I have since passed on my first bracelet, double-stranded black leather, to my sister. I am currently rocking a one strand gray leather bracelet.

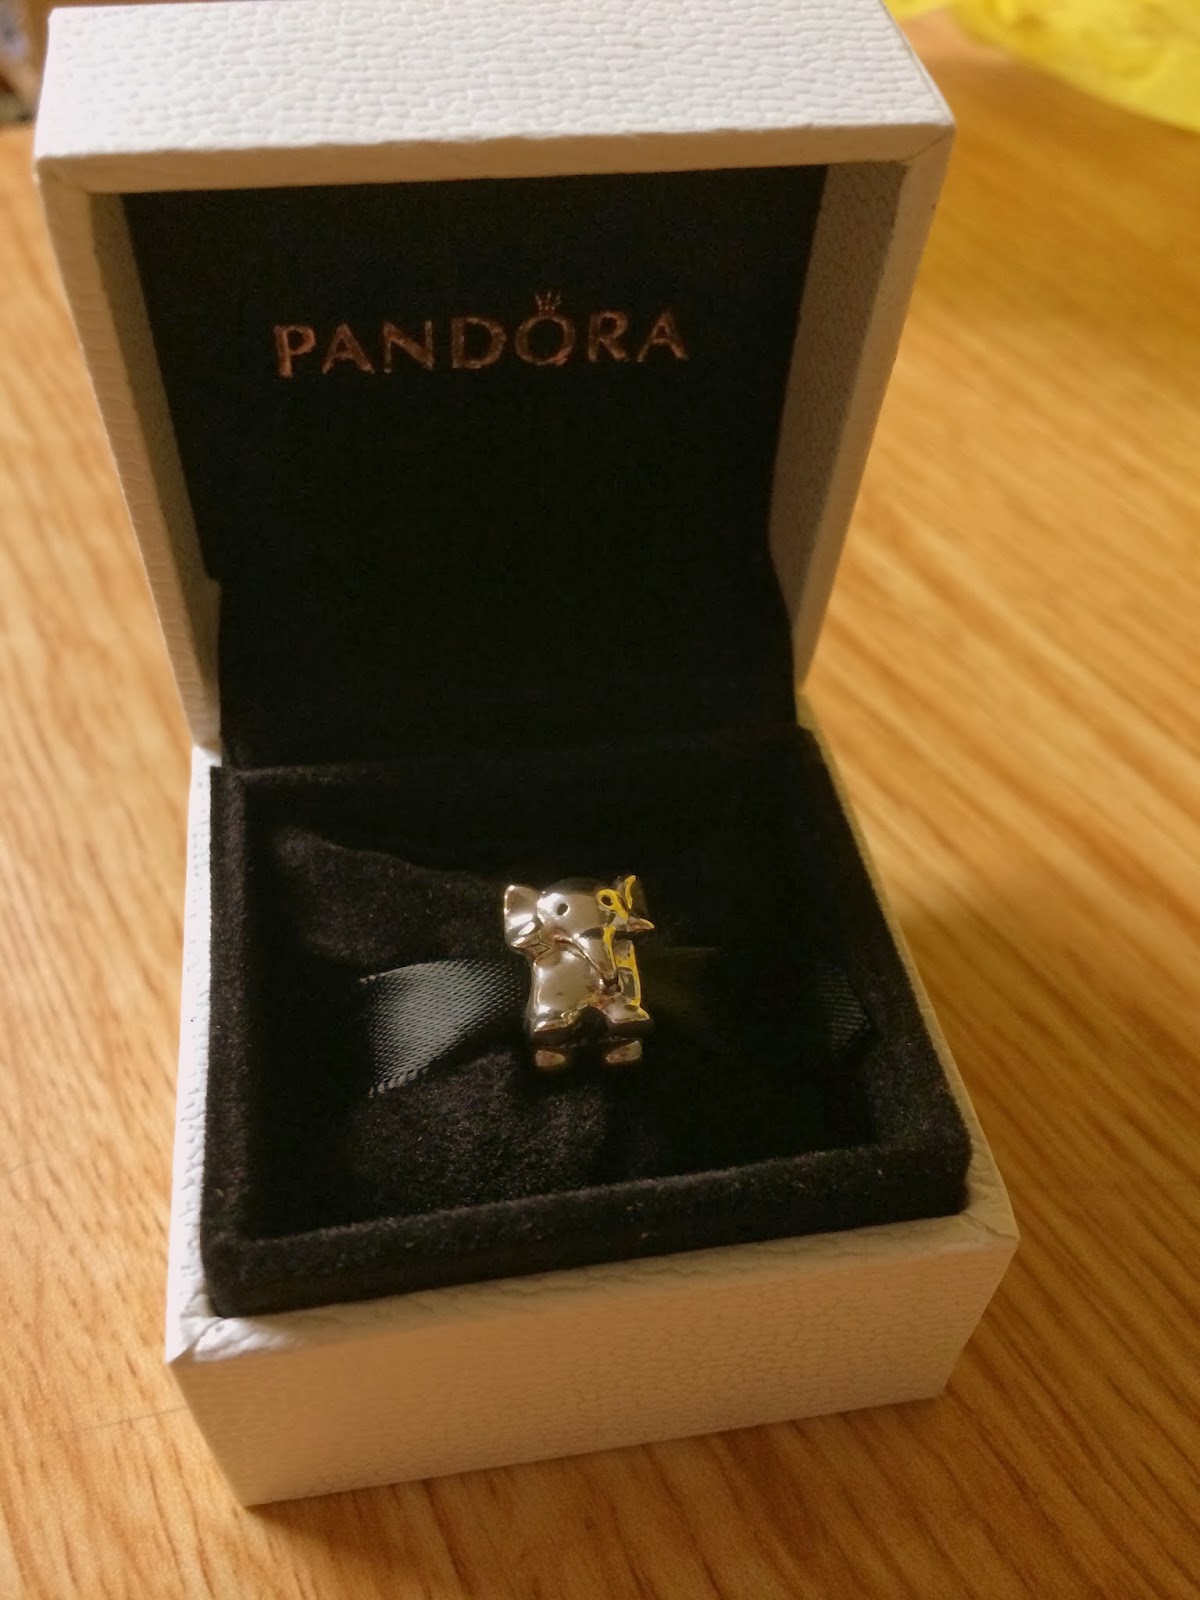
Pandora has so many charm options for every walk of life, occasion, mood and fancy! I have seen many women wear just one simple bead while others fill the whole bracelet with beads meaningful to them. The beads range from $15 to hundreds of dollars. This past Christmas, my sister and I exchanged Pandora beads. I picked out one of her favorite animals, the most adorable little elephant! She gifted me a beautiful bead that represents my life outlook in many ways, "Silver Linings."

If you are looking for a unique and personal gift, definitely check Pandora out. It will even provide easy gift ideas, more momentous beads, for the special occasions to come.