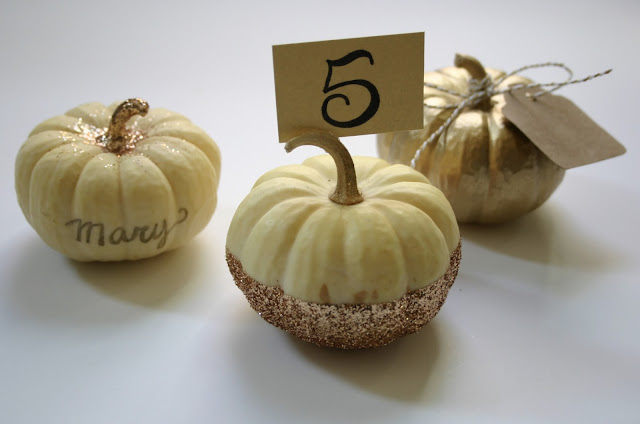
This year, I used my leftover white pumpkins {which in reality turned a little yellow over the past few weeks} to make a few pumpkin place cards, table numbers and party favors! These would be so pretty for at your Thanksgiving table or for a fall bridal shower. These pumpkins are inexpensive and easy but would be stunning additions to your table!
Pumpkin Place Card
This place card pumpkin is so delicate and simple! Plus you can add a pop of glitter and color without making a huge mess.
Supplies:
- Mini Pumpkin
- ModPodge
- Paint Brush
- Glitter
- Pen
Directions:
1. Paint your ModPodge on the stem and around the top of your pumpkin.
2. Add glitter onto ModPodge. Allow time to dry.
3. Add guest's name to the front of the pumpkin.
Pumpkin Table Number
While I used this pumpkin for a table number, you could also customize the little card into a place card or food menu card. I love this glitter pumpkin design because it is classy and elegant.
Supplies:
- Mini Pumpkin
- ModPodge
- Paint Brush
- Glitter
- Painter's Tape
- Knife
- Table number
Directions:
1. Start by taping the top of your pumpkin using the painter's tape.
2. Using your paint brush, spread ModPodge on the bottom of the pumpkin.
3. Add glitter to the painted area.
4. Remove the tape carefully.
5. Use a knife to cut a small slit in the top of the pumpkin stem.
6. Add your table number and display!
Pumpkin Party Favor
Last but not least, this shiny pumpkin was so incredibly easy and fast to make, it felt like cheating to call it a DIY! This could look stunning in different colors, especially if you are looking to match wedding colors or your Thanksgiving Day centerpiece. The pumpkin could sit at each guest's place setting as a take home favor!
- Mini Pumpkin
- ModPodge
- Paint Brush
- Glitter
- Pen
Directions:
1. Paint your ModPodge on the stem and around the top of your pumpkin.
2. Add glitter onto ModPodge. Allow time to dry.
3. Add guest's name to the front of the pumpkin.
Pumpkin Table Number
While I used this pumpkin for a table number, you could also customize the little card into a place card or food menu card. I love this glitter pumpkin design because it is classy and elegant.
Supplies:
- Mini Pumpkin
- ModPodge
- Paint Brush
- Glitter
- Painter's Tape
- Knife
- Table number
Directions:
1. Start by taping the top of your pumpkin using the painter's tape.
2. Using your paint brush, spread ModPodge on the bottom of the pumpkin.
3. Add glitter to the painted area.
4. Remove the tape carefully.
5. Use a knife to cut a small slit in the top of the pumpkin stem.
6. Add your table number and display!
Pumpkin Party Favor
Last but not least, this shiny pumpkin was so incredibly easy and fast to make, it felt like cheating to call it a DIY! This could look stunning in different colors, especially if you are looking to match wedding colors or your Thanksgiving Day centerpiece. The pumpkin could sit at each guest's place setting as a take home favor!
Supplies:
- Mini Pumpkin
- Spray Paint
- Twine
- Tag
Directions:
1. Spray the pumpkin with desired spray paint.
2. Allow the pumpkin time to dry before adding the twine and tag. Add a guest's name or a short message to the tag!
That's it!! I hope you are able to find a few minutes to make these pretties for your Thanksgiving table, a Friendsgiving dinner or an upcoming fall bridal event. Happy November!!


No comments:
Post a Comment