Tired of the regular boxed mac 'n cheese? Looking to mix some healthiness into those cheesy noodles? Looking to mix some not so healthy, but extremely tasty bacon? This recipe is an easy weeknight recipe to have on hand.
It'll please both the kids and the adults. Kids will love the bow-tie noodles, cheese and bacon, and if you're lucky they might even eat the spinach mixed in. Not a lover of veggies myself, this was an easy way to get some spinach into my system without it being the main focus of the dish. And yeah the bacon isn't screaming healthy, but I figure it balances the spinach. Right? Serve this dish for lunch or dinner. The dish will certainly break up the monotony of your everyday mac 'n cheese.
Spinach and Bacon Mac 'n Cheese
Prep Time: 25 min
Start to Finish: 25 min
Servings: 6
Ingredients
3 cups uncooked bow-tie (farfalle) pasta (8oz)
1/2 lb sliced bacon, coarsely chopped
2 tbsp butter
1 small clove garlic, finely chopped
1/4 cup all-purpose flour
1/4 tsp salt
1/4 tsp pepper
2 cups milk
2 cups shredded sharp Cheddar cheese (8oz)
1 bag (6oz) fresh baby spinach leaves, coarsely chopped
Directions
1. In 10-inch skillet, cook bacon over medium heat 5 to 8 minutes, stirring often, until crisp. Remove to paper towels. Drain, reserving 2 tbsp of drippings.
2. Meanwhile in 5-quart Dutch oven, cook and drain pasta as directed on package. Return to Dutch oven; cover to keep warm.
3. In 3-quart saucepan, heat butter and reserved bacon drippings over medium heat until butter is melted. Add garlic; cook 30 seconds or until fragrant. Stir in flour, salt and pepper with whisk until smooth. Stir in milk; heat to boiling. Stir in cheese until melted and sauce is smooth.
4. Pour cheese sauce over pasta; stir until coated. Stir in spinach. Reserve 1/4 cup of the bacon; stir remaining bacon into pasta mixture.
5. Divide pasta mixture among 6 serving bowls; garnish with reserved bacon.
Recipe from Pillsbury
Nutrition Breakdown: per serving (1 cup)
-Calories 470 -Total Fat 24g -Sodium 810mg -Dietary Fiber 2g
Craft Corner, Paint the Town, Beauty Parlor, What's Cooking, Let's Party, Bookshelf, World Wanderer
Thursday, March 27, 2014
Wednesday, March 26, 2014
Sewing Machine Projects
Ok but seriously, how cute are these?? My mom got a new Brother sewing machine and she has been working on some fun new projects. She whipped out some adorable kitchen towels yesterday and I just had to share. My mom has been sewing her whole life, she used to make her own clothes and has made many an outfit for her six children. She is a mastermind and very talented!!
She recently learned how to make mittens out of old wool sweaters (that DIY commentary will have to come at a later time). She made many pairs of mittens, giving them away to friends or people who mentioned needing or wanting new mittens. Most of the time, her mitten giveaways were prompted by a little prayer to find the right person to give them to. I know many hearts were blessed by her generosity and beautiful work. Since her mitten project, she has been itching for a new sewing machine. Luckily, my dad is awesome and bought her one for her birthday! This sewing machine is incredible. It is like a computer and has all sorts of patterns and stiches programmed into it. I can't wait to see all the fun pieces that she makes. I foresee a lot of cute towels, baby blankets and onesies in our futures.
These particular patterns were used on kitchen towels for my cousin's bridal shower gift. My mom used thread that had varying color shades making the end result look like she had sewn on different colored threads individually. What a cool pattern and sweet project! I am planning on commissioning her to monogram everything!!
Monday, March 24, 2014
Braised Lamb Meatballs
For one of his classes, Joe had to read the Hungry Planet: What the World Eats book. This book was written by two journalists and is filled with pictures and information about families' eating habits all over the world. It documents what they eat on a weekly basis, where they get their food and how much a week of groceries costs them. I paged through the book and even sat down to watch the TED talk about the couple's travels. Even just the basic information from some of the articles or the TED talk online is very enlightening. It is crazy that one family of eight can live off of $30 for food a week, while another family of four spends $500 a week on beer and processed foods.
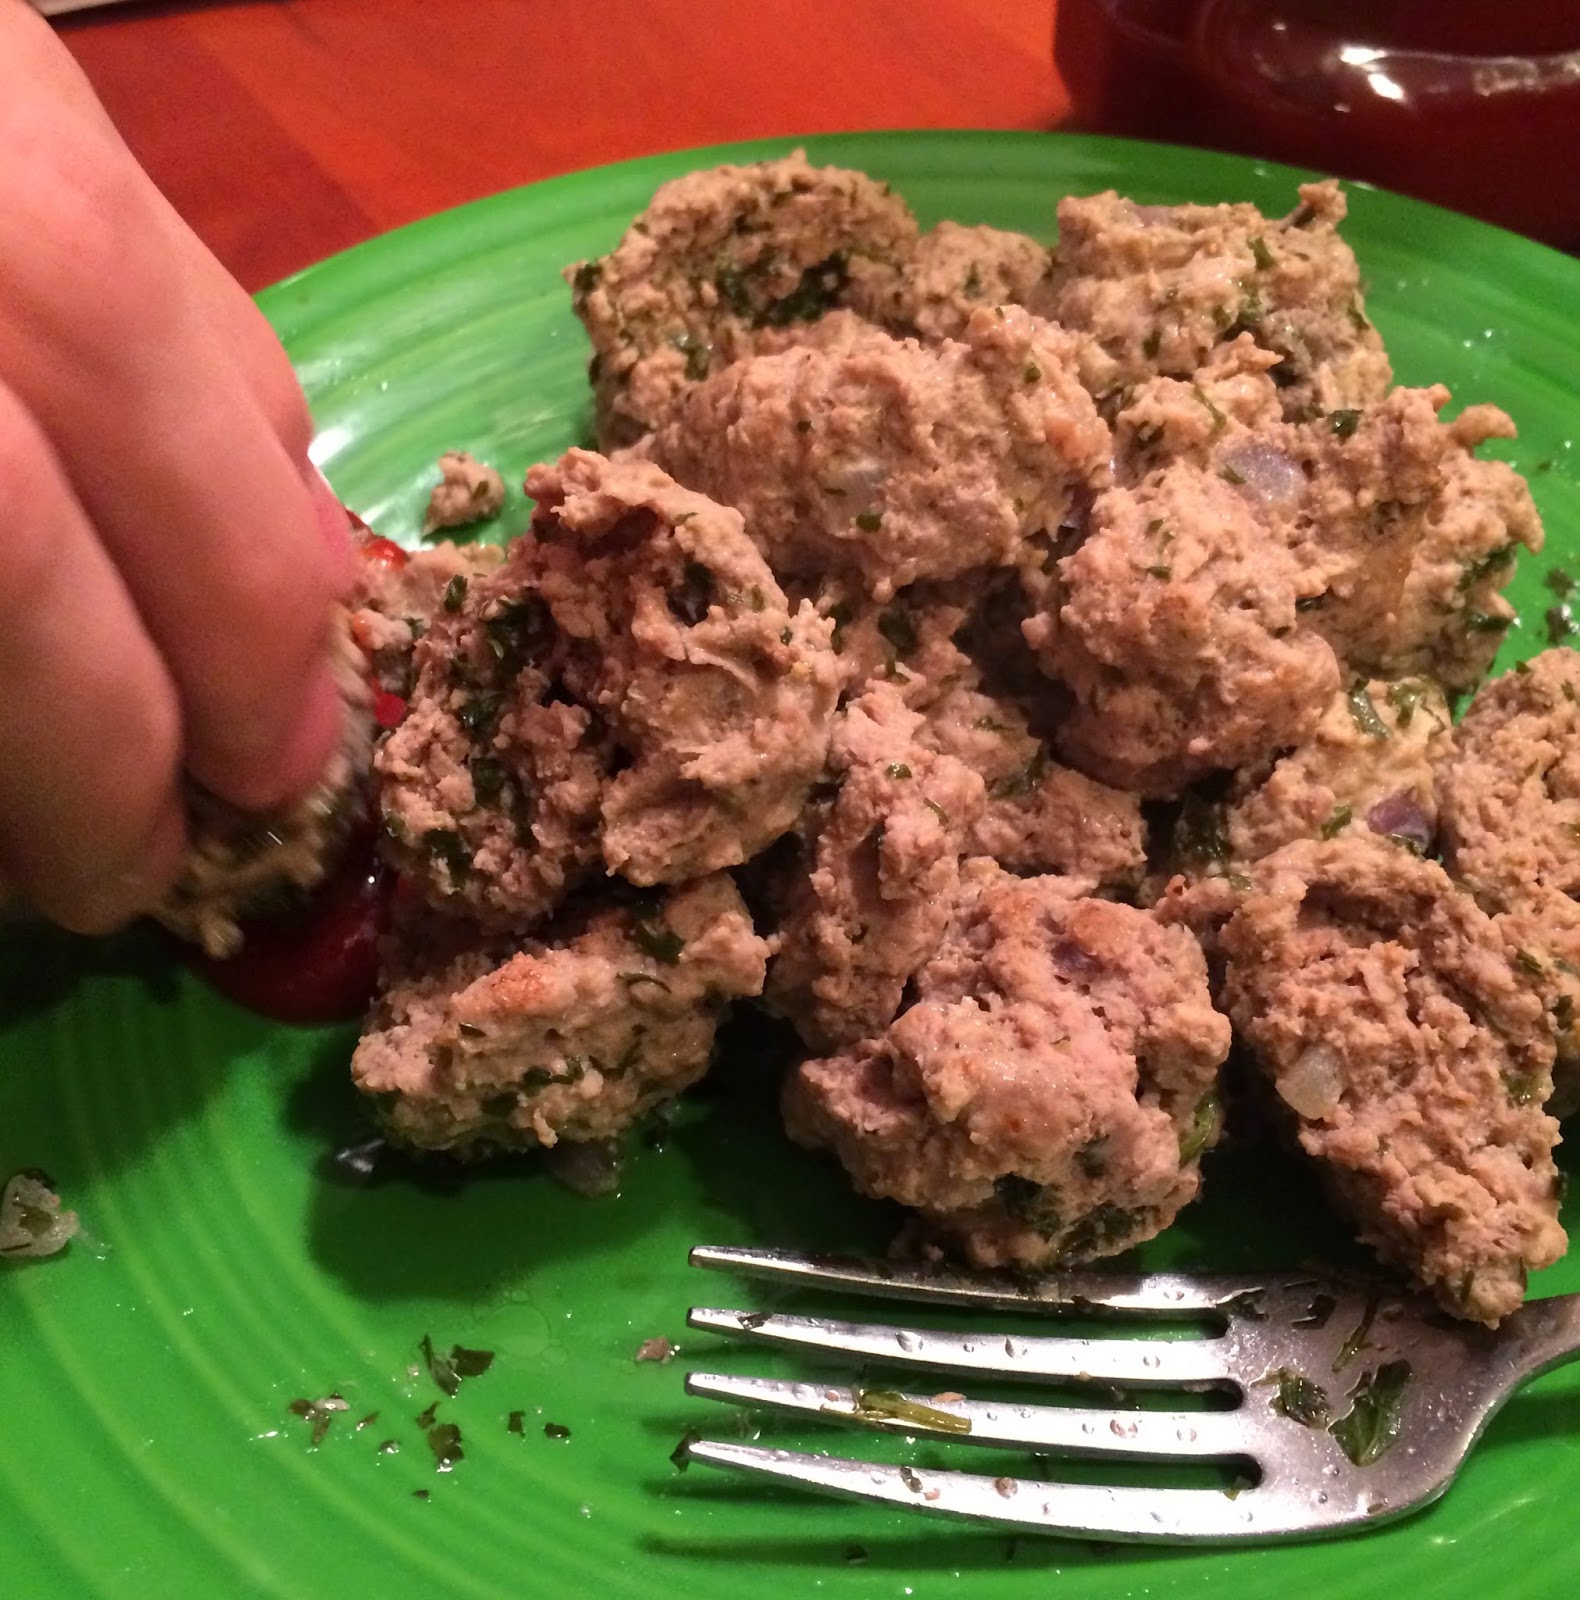
Part of the assignment was to make a recipe from the book. Joe chose to make a meatball recipe that was provided from a rural, poor family in the outskirts of Bejing. This family has the mentality that nothing should be wasted and that meat is especially precious. I was able to witness the excellent cooking job done by my fiance and now he can add that to his recipe repertoire for married life. The end result was fresh and delicious. We did end up adding some extra spice to it but it was a relatively easy weeknight meal.
Braised Lamb Meatballs
Ingredients: - 1 lb of lamb, minced or ground (yields about 12 meatballs)
- 1 tbl sp onion
- 1 tbl sp ginger
- 1/2 tbl sp all spice
- 1 egg
- 1 tbl sp cilantro
- 1 tbl sp chicken bouillon
- 1/4 t sp pepper
- 1/4 c white vinegar
- salt to taste
Directions:
1. Combine onion, ginger, all spice powder and salt into the lamb meat. Add egg and knead until ingredients are thoroughly combined.
2. Mold lamb into medium sized meatballs, Boil 6 cups of water and carefully place each meatball into the water.
3. Bring water to medium and simmer the meatballs for 15 minutes.
4. In remaining water, add cilantro, chicken bouillon, pepper and vinegar. Let meatballs sit in the mixture for three minutes.
5. Strain any remaining water and serve. We also added some all spice and pepper to taste. Another option is to add fresh mint leaves.
Friday, March 21, 2014
Divergent Series
With the premier of the movie last night for the first book Divergent, I just had to share my love of the books! Couldn't put the books down. It's another series about a dystopian society, but it's one of my faves of what's out there. You gotta love a series with strong female characters and a guy that falls in love with her for exactly who she is. Plus the almost nonstop action keeps your pulse racing.
I'm kind of a sucker for dystopian society novels, which is the rave right now in the young adult book world. Trust me when I say I have read many a book on dystopian societies, and this is one that you got to read. Definitely would rank this alongside The Hunger Games trilogy, another series I couldn't put down and just had to share through a Hunger Games post. Both have got huge fan followings, and many who enjoyed one series liked the other too. If I had to, I'd rank the Divergent series above The Hunger Games since I thought the writing style and details of the books were better executed.
I thought Veronica Roth's concept of a society dissolved into factions that each are known for specific skills and philosophies was entertaining. And her story telling makes it easy to imagine it all as events unfold. The books are full of action. As I read Divergent I'd catch myself holding my breath and so absorbed in the development of the characters I'd forget its not real. Just when I'd recover the action would pickup again. Who says reading isn't like riding a roller coaster? I could easily imagine the plot and all the characters that Veronica Roth had me loving or hating. Should be very interesting to see how my perception of Divergent differs from what appears on the big screen. All I know is it'll be a lot of action, with seat gripping anticipation, so I'd better bring popcorn for some nervous munching.
Like I said before, books that focus on dystopian societies are popular right now. Their popularity stems from the fact that people like to ask "What if?" but enjoy seeing their "What if?" questions played out in a world that has the same rules as our own. It's hard not to be captivated by looking at our world and a possible future world, and consider all those steps in between the two. Also, the main characters in a dystopian book tend to discover they are strong, take charge of their lives individuals even in harsh environments. They're characters we can admire and hope that deep down if we needed to be, we too would have that type of courage.
Well you're in luck because the Divergent series will make you ask that "what if?". Whether you're a teen or an adult, most enjoy a peek at a possible future. Even a future that might appear as a utopia to some is a dystopia to others. So read the books and see where you think you'd fit into this world.
Are you Amity? A person valuing happiness and strong relationships over justice?
Or Candor? If you see honesty and impartiality as more important than kindness that's you.
Erudites focus on knowledge, acquiring more to control.
Dauntless people feel freedom and justice are most important compared to safety, to comfort.
Or your final choice Abnegation where others matter and selflessness is valued most.
Hard to pick huh?
Maybe, you don't fall into just one of those categories.
Maybe, just maybe, you're one of the few, the ones who call themselves Divergent?
Wednesday, March 19, 2014
Quick Appetizer : Caprese Bacon Skewers
No matter what time of year, it's always smart to have some quick appetizers recipes in your back pocket. You never know when you will need them for a holiday party, summer barbecue or other scrumptious get together. The trick is finding a few that are flavorful, light and maybe even healthy! With a some inspiration from my bacon-loving fiance, I customized a recipe for caprese sticks and it had been a hit at every party that I have brought them too. They definitely meet the standards of light, healthy and very, very tasty!!
Caprese Bacon Skewers
Prep Time: 10 minutes
Cook Time: 20 minutes
Ingredients:
- Cherry tomatoes, cut in half with inside seeds scrapped out
- Mozzarella balls (small) or large ball/block cut into half inch chunks
- Basil leaves, if large leaves, cut in half
- Half package of bacon, fried or cooked
- 1 cup balsamic vinegar
- Toothpicks or small wooden skewers
1. Cut tomatoes in half and scrape out the seeds inside.
2. Cut mozzarella if not already in prepped balls.
3. Cook bacon and then cut into half inch chunks.
4. Let balsamic boil before letting simmer for a few minutes on medium. Should come to a nice, thick consistency.
5. Wash and cut basil leaves if needed.
6. Using the toothpicks, begin creating skewers as desired. For visual color, I put the cheese on top, then the bacon, followed by the basil leaf and finally, the cherry tomato. I placed the cut half of the tomato on the bottom so that the skewers would sit nicely on the plate.
7. Once balsamic has cooled, drizzle over the skewers. Refrigerate until serving.
Another fun idea: skewer fruit onto small toothpicks and cover with chocolate. See the banana split bites post for directions on how to make those sweet and tasty dessert skewers!
Tuesday, March 18, 2014
DIY Family Name Picture Display
The family name. A name holds a lot of significance. A last name reminds us of where we come from, and the family history that has occurred to people holding our same last name. It's a tie to the past, and symbol of the future as we look forward to passing on our family name to future generations. A family name is special no matter how you came to it. Your spouse and you can chose to go the traditional method and take your husbands last name, combine your two last names with a hyphen, take the wife's last name (which is what we did - a tad nontraditional but totally right for us), or even make a new last name by combining your two last names.
Proud of your family name? There's a lot of ideas out there on how you can tie in your family's last name to your household, and make it creatively yours. One such idea, displaying the family name through pictures is an easy way to put your mark on your home. You can have it greeting guests at the entrance to your home, hanging proudly in the family room or in the kitchen as a reminder of the importance of family. No matter where you hang it the purpose remains the same, to serve as a reminder that you are proud of where you come from and who you are as a family.
The Idea... is to compile pictures that represent the letters in your last name. This could take a while to do since you typically try and find alphabet letters in everyday circumstances. You can do this two ways, either snap them whenever you happen upon them or plan some time to really search them out.
Materials:
Frame
Picture Mat - with enough slots to spell name
Alphabet Letter Pictures - (4x6)
It's really that simple! The time it takes you to complete the project will all depend on how you tackle obtaining the photos, but that's the fun part of the project so be creative. This is a project that you can keep forever, and even pass on to your kids someday!
Proud of your family name? There's a lot of ideas out there on how you can tie in your family's last name to your household, and make it creatively yours. One such idea, displaying the family name through pictures is an easy way to put your mark on your home. You can have it greeting guests at the entrance to your home, hanging proudly in the family room or in the kitchen as a reminder of the importance of family. No matter where you hang it the purpose remains the same, to serve as a reminder that you are proud of where you come from and who you are as a family.
A friend's Family Name Picture Display |
If you decide to go with the first method it makes a great project to work on as a family on your vacations! The picture display once finished may hold even more meaning then as your family recalls where they found each letter.
If you chose method two and want to involve your family, it'd be easy to take a weekend and the kids would surely get a kick out of trying to find letters in everyday things.Either way it can make a great family activity. But maybe you're just starting out with your spouse and you want to make it symbolize your new life together. It also makes a GREAT personal decorative wedding gift. If you'd like add the wedding date to the picture mat and symbolize the newlyweds (whether it's you or for others) joining together under the family name. Could even add kids births too if you'd like, as additions to the family occur.
Materials:
Frame
Picture Mat - with enough slots to spell name
Alphabet Letter Pictures - (4x6)
It's really that simple! The time it takes you to complete the project will all depend on how you tackle obtaining the photos, but that's the fun part of the project so be creative. This is a project that you can keep forever, and even pass on to your kids someday!
A family name holds a lot of meaning and what better way to display your name proudly for all it represents than through a Family Name Picture Display.
Monday, March 17, 2014
St. Patrick's Day in New Orleans
St. Patrick's Day is one of the best holidays out there. I am a tad biased since it's my mom's birthday, a fully dedicated Irish holiday and I have visited lovely Ireland, making it all the more special to see the green shamrocks everywhere. I especially love St. Patrick's Day parties. It is the perfect time to grab some green, dye your beer and wipe out that Guinness tshirt. People love getting into the spirit of the holiday and my group of friends seems to especially appreciate the Irish background. A few years ago, my parents gifted me a trip to New Orleans over my Spring Break. I was able to take my friend (who's now my sister-in-law!) Mary. We went right after Mardi Gras but just in time for St. Patrick's Day. What a blast!!
I do believe that New Orleans, LA aka NOLA, finds just about any reason to have a parade. We went to church that morning and then spent the whole afternoon at the parade. People meet friends and family, many have relatives or friends in the parade. There are parades all over the city! Floats and displays are decked out in shamrocks and green sparkles. The streets were lined with stores and vendors selling "Shamrock Lemonade," a vodka drink with some lemonade that is dyed green.
Men walked down the street with what looked like umbrellas that had a strip of Styrofoam down the center to hold the masses of fake orange, white and green flowers. Each gentleman who walk up a lady (many times, someone they knew) and would give a hug or kiss on the cheek before presenting her a flower. Many also carried buttons, trinkets and beads. SO MANY beads!!! I came home with a bag full just from that parade alone. We were a bit tired after standing for hours. I don't know how those NOLA folks do it every year! But the whole experience was so much fun.
Other New Orleans highlights:
The Manor houses. We visited Oak Alley, which was stunning. They were amazing. Rich with history and so beautiful.
Beignets. Yum!!
Burbon Street. This wasn't our fav but we did love that we were allowed to walk out of the bar onto the street with a classic Hurricane drink. We sipped as we explored and walked to dinner in another area of town.
Drive through Daquaries and Snowballs. Most neighborhoods have little cement Snowball stores that people can walk to. They are open in the early spring until the late winter. Don't confuse them with snowcones! These treats are perfectly shaved ice with one of many flavors (my favorite was Tiger's Blood). You can get it plain or "stuffed" with ice cream in the middle. Oh, and they are incredibly inexpensive! Definitely indulged in a number of those when we were there, including on our way to the airport!
Airboat Rides. We made the trek out to the wetlands and went on an awesome airboat ride. The views were incredible. Feeding alligators wasn't half bad either! Just dress warmer than you think, the wind really whips you.
Friday, March 14, 2014
Irish Landmarks and Landscapes
In honor of St. Patrick's Day it seemed fitting to write a post in tribute to Ireland. Not having had the opportunity to visit Ireland myself, although Irish blood flows through my veins, I sought out my best friend Melanie. Having spent over 4 months in Ireland through her study abroad program I figured if anyone could give a great synopsis of Ireland she could.
You can’t celebrate on March 17th without a little green beer and lots of Irish cheer. Get into the St. Paddy’s Day mood with a tour of some famous Irish landmarks and landscapes. These photos were taken during my study abroad semester in Ireland in spring 2010.
The Blarney Stone is one main tourist attraction in southern Ireland. The site is a few miles from Cork, the second largest city in Ireland and my home base during the semester. It is said if you kiss the Blarney Stone, you will be given the gift of the Gab – a remarkable and unique way with words. One example of Blarney…
Being a good student of Irish culture, of course I had to attempt it. Yes, attempt it. This isn’t something that can just be done. First, one must conquer a fear of heights. Blarney Castle is basically in ruins – no roof, etc. – which is fair, because it’s super old. But that does require a hopeful kisser to muster some courage and climb steep and narrow stairs. When you make it to the top, you find that not only will you have to venture down the stairs again when you are finished, but in order to actually kiss the stone, you have to lie on your back and scoot backwards over the edge of the castle. YES – the Blarney Stone is on a part of the castle that can only be accessed safely by having an attendant hold your back. Oh, but don’t worry, two metal bars would catch you if there were an accident. Not so nice for an individual who is scared of heights, but…. I had gone all the way there, and on Valentine’s Day no less.
The Cliffs of Moher are another iconic feature of the Irish landscape. An interesting part of the sight is that there is a large sign that reads something to the effect of, “No Passing Beyond This Point” near the top of the cliff side. It is kind of comical because no one obeys the sign. There did not appear to be any authority figures present attempting to enforce the rule, not that that fact makes it OK, but we couldn’t decide how relevant the command was for the present.
One final attraction (because it is St. Patrick’s Day, after all) is the Guinness Storehouse. Now, I had never had a Guinness before arriving in Ireland but after enjoying the unique flavors and pouring rules (it’s actually an art), the Guinness Brewery was definitely worth the admission fee. But that is mostly because you can Pour Your Own Pint and enjoy a glass of the frothy brew and 360 degree view in the top-floor bar. Fun fact: the building itself is shaped like a Guinness pint glass and the top floor bar looks like the foam on top.
You can’t celebrate on March 17th without a little green beer and lots of Irish cheer. Get into the St. Paddy’s Day mood with a tour of some famous Irish landmarks and landscapes. These photos were taken during my study abroad semester in Ireland in spring 2010.
The Blarney Stone is one main tourist attraction in southern Ireland. The site is a few miles from Cork, the second largest city in Ireland and my home base during the semester. It is said if you kiss the Blarney Stone, you will be given the gift of the Gab – a remarkable and unique way with words. One example of Blarney…
Being a good student of Irish culture, of course I had to attempt it. Yes, attempt it. This isn’t something that can just be done. First, one must conquer a fear of heights. Blarney Castle is basically in ruins – no roof, etc. – which is fair, because it’s super old. But that does require a hopeful kisser to muster some courage and climb steep and narrow stairs. When you make it to the top, you find that not only will you have to venture down the stairs again when you are finished, but in order to actually kiss the stone, you have to lie on your back and scoot backwards over the edge of the castle. YES – the Blarney Stone is on a part of the castle that can only be accessed safely by having an attendant hold your back. Oh, but don’t worry, two metal bars would catch you if there were an accident. Not so nice for an individual who is scared of heights, but…. I had gone all the way there, and on Valentine’s Day no less.
Even though Blarney Castle is in shambles, Blarney House, also on the grounds,
looks like a fairy princess castle.
The Cliffs of Moher are another iconic feature of the Irish landscape. An interesting part of the sight is that there is a large sign that reads something to the effect of, “No Passing Beyond This Point” near the top of the cliff side. It is kind of comical because no one obeys the sign. There did not appear to be any authority figures present attempting to enforce the rule, not that that fact makes it OK, but we couldn’t decide how relevant the command was for the present.
One final attraction (because it is St. Patrick’s Day, after all) is the Guinness Storehouse. Now, I had never had a Guinness before arriving in Ireland but after enjoying the unique flavors and pouring rules (it’s actually an art), the Guinness Brewery was definitely worth the admission fee. But that is mostly because you can Pour Your Own Pint and enjoy a glass of the frothy brew and 360 degree view in the top-floor bar. Fun fact: the building itself is shaped like a Guinness pint glass and the top floor bar looks like the foam on top.
Some other great Irish views while we're at.
Thursday, March 13, 2014
DIY Quote Canvas
Another DIY activity that is always great is making quote canvases. They make perfect projects as you can create and customize in any way that you'd like depending on the person you are gifting it to, the room you are decorating or the mood you are in. They aren't time consuming. And of course, they are a blast! You can find affordable canvases at your local craft store or even at your local Walmart in the craft section.
Supplies:
- Any size canvas
- Acrylic Paint and brushes
- Stencil or cut out letters
Directions:
1. I have painted the letters for my quotes a few different ways. The way that I prefer, start with painting the letter color onto the canvas first. Let the paint dry while you prep the quote
2. Using a Cricut and sticker maker, I cut out my desired quote. I then placed the letters on the canvas using some removalable sticky tack and painted the main color around them. I let the paint dry a bit and then peeled the sticky letters off, revealing the original paint beneath.
3. Touch up the letters if any of the main color leaked onto the quote letters.
4. Add any other paint, shapes or creative elements to finish your canvas.
Wednesday, March 12, 2014
Cheddar Bay Biscuits
If you've been to Red Lobster you've probably tasted Cheddar Bay Biscuits. And if you've tasted the biscuits your mouth is watering and you're thinking of when you can set out for Red Lobster. Well no fear, you no longer need to eat out to get the biscuits, they can be made right at home.
For those of you who haven't been to Red Lobster, neither have I since seafood isn't my thing, these are what you have to try. My husband raved about the biscuits to the point that my mom ordered just the biscuits through the To Go for all us to try. He wasn't exaggerating their deliciousness. We were impressed. So when my mom discovered make your own boxed Cheddar Bay Biscuits at the grocery store we were all game.
There are two different box types offered. One makes 30 biscuits or 3 sets of 8-10 biscuits, and another makes 10 biscuits. They are reasonably priced, especially compared to the cost of eating out just to taste these fluffy morsels covered with herb garlic butter. Yes I'm salivating. If you're curious about the recipe, here it is.
Recipe
Biscuit
3/4 cup Cold Water
1/2 cup Shredded Sharp Cheddar Cheese
1 package Cheddar Bay Biscuit Mix
Herb Butter Sauce
1/3 cup Butter
1 Pouch Garlic Herb Blend (enclosed)
Before you begin. Preheat oven to 425 degrees. Line baking sheet with parchment paper or spray baking sheet with non-stick cooking spray.
1. Stir together water, cheese and biscuit mix until dough forms (do not overmix).
2. Scoop dough immediately into 8-10 potions (about 1/4 cup each) and place 2 inches apart onto prepared baking sheet.
3. Bake 14-16 minutes or until golden brown on top. Melt butter in a microwave sage bowl, add garlic herb blend and stir until well blended.
4. Spoon or Brush 1 tsp garlic herb butter sauce onto each HOT biscuit. Serve immediately.
Tuesday, March 11, 2014
Raspberry Torte Cake
This cake is one of my dessert obsessions and one of my go-to recipes. Therefore, I was a bit hesitant to share it publicly. My mom found this cake recipe many years back and it has been a favorite of mine since I was a teenager. I have made many variations as well, anything from mini-cupcakes, full sized cupcakes and a trifle style dessert. This cake is amazing, scrumptious and has passed the Brickweg family standards. If something about the recipe doesn't appeal to you, just have fun with it. Experiment with your favorite cake flavors (red velvet works great) or instead of the raspberries it calls for, try it with peaches or strawberries. As you can see from the picture, we added blackberries for this birthday cake and it was delicious!
Ingredients:
- 1 pkg devil's food cake mix (without pudding)
- 1 pkg (8 oz) cream cheese, softened
- 2/3 cup brown sugar, packed
- 1 tsp vanilla extract
- 1/8 tsp salt
- 2 cups whipping cream, whipped
- Small bar of semisweet or dark chocolate
- 1 pkg raspberries
Directions:
1. Mix and bake cake according to package directions. Bake in two 9" cake pans.
2. Cool in pans for 15 minutes. Remove from pans and allow to cool on wire rack.
3. Beat together cream cheese, brown sugar, vanilla and salt until fluffy. Fold in cream.
4. Split each cake into two horizontal layers. Place on serving plate.
5. Spread 1/4 cream mixture, raspberries and chocolate. Repeat layers for all four layers.
6. Cover and refrigerate for 8 hours to harden the filling.
Thursday, March 6, 2014
Refurbished DIY Jewelry Presenters
One of my recent hobbies is to take old pieces from around the house that are no longer in use and revamp them. There are so many different ideas out there to rehang your keys, reorganize your shoe storage or rearrange your closet. I found an old ribbon holder that my mom had cast aside due to the rods continually falling out, causing frustration. I used it to make a pretty jewelry holder.
I started by strategically rearranging the rods so that the bottom could hold necklaces, the middle would have room for bracelets and the top could hold rings. I also was thoughtful on which jewelry to hang on the rods, knowing that the rods were a pain if I needed to take them on and off. Once I picked out the right pieces to hang, I carefully lined them up on the rod to avoid having to take it off each time but could instead just take off each jewelry piece individually. The end result turned out cute and is a fun way to hang accessories!
Another idea that I saw recently is to take an old picture frame, or purchase one at the dollar store for cheap, and remove the glass. Then using old or new door knobs, glue them onto the frame to create hangers for necklaces or bracelets. This is much cheaper than a jewelry holder and this won't take up any dresser space!
You can use a similar concept of the knobs and frames when making a key holder. Your keys will stay organized but will look nice too!
I also love the idea of putting jewelry or hair accessories in fun apothecary jars or hanging them so that they are visually beautiful. Below are a few ideas that I came across and that I am totally diggin' at the moment!
Wednesday, March 5, 2014
Bruschetta Chicken
In college, my roommates and I moved into a house which has previously been inhabited by five agriculture students. One of my roommates worked hard to upkeep their garden full of vegetables. The result was a LOT of fresh tomatoes. This was the first time that I realized my total obsession for bruschetta. There is nothing like homegrown tomatoes with a little olive oil and balsamic on some toasted bread. Yum! I have made a few different dishes, like bruschetta pasta, that incorporated the delicious concoction. I cooked up a bruschetta chicken recipe for a family dinner and it was very tasty and healthy!
Ingredients:
Prep Time: 30 minutes
Cook Time: 45 minutes
Servings: 8
- 1/2 cup flour
- 2 eggs, beaten
- 4 boneless, skinless chicken breasts (cut in half)
- 1/4 cup grated parmesan cheese
- 1/4 cup crushed garlic croutons
- 1 tablespoon butter, melted
- 2 large tomatoes
- 3 tablespoons minced fresh basil
- 2 garlic cloves, minced (appox. 1 teaspoon)
- 1 tablespoon olive oil
- Salt & pepper to taste
- Italian marinating seasoning
Directions:
1. Marinate chicken in Italian seasoning prior to baking.
2. Preheat oven to 375 degrees. Grease 9x13 baking dish.
3. Place flour & beaten eggs in separate shallow bowls. Dip chicken into flour, then into eggs. Place into baking dish.
4. Combine parmesan cheese, crushed croutons, & melted butter then sprinkle on chicken. Loosely cover with foil.
5. Bake for 30-40 minutes, or until top is browned and chicken is cooked through.
6. Chop tomatoes and combine with last ingredients. Spoon mixture over chicken, and return to oven for 5-7 minutes or until tomato mixture is heated through.
Tuesday, March 4, 2014
Carnival in Spain
Today if you were in Spain you would be celebrating Carnival. Carnival in Spain, like elsewhere around the world, marks the start of Lent, the 40 days before Easter. Spain which was a devoted Catholic country still has a number of people that follow the religion, and even those that aren't Catholic partake in the festivities. The most popular and extravagant carnival celebrations happen
in Cadiz and Tenerife, but Segovia where our study abroad group was
living, also had a small celebration. The carnival can last for days, but in Segovia it was a tad more conservative. Although, there was some celebrating over the weekend too.
There is a procession of decorated floats through the streets, music, people decked out in costumes and lots of feasting. Our study abroad group was so excited to gather up items for costumes, as for us it was similar to the Halloween we celebrated in the U.S. Except there is a BIG difference....no one was handing out candy. For those candyholics out there, myself included, we're thankful there is a Halloween. And it is for that reason Halloween would trump Carnival. But even without the chocolately treats, Carnival created quite a spectacle. All decked out in costumes we went out to celebrate with the rest of Segovia the last evening before Lent began.
Personally, I thought it was so cool to celebrate the start of Lent in this way since I never had before. The parade was small, but there was something special about the celebrants parading down the cobblestone and brick pathways, leading all the way to the great Roman Aqueduct that Segovia is famous for. The parade had jugglers, flame eaters, and lots of group costumes. There were some dressed as wizards (the Merlin kind of wizards not Harry Potter wizards - in case you were wondering), some jellyfish costumes using umbrellas and lots and lots of masks.
I got a kick out of being a butterfly in March. It was a tad cool, being that it was in fact March, but just like Halloween in Minnesota, sometimes you gotta sacrifice function for fashion. Besides dressing like this in March in MN, would never happen so we all celebrated it while we could. I mean if you compare the temperatures today in MN, no one in their right mind would be parading around in tights, long sleeves, antennas and wings. Hmmm...why would I choose to live in such a harsh climate? Plain crazy I guess, but luckily there are a whole lotta other people, just as crazy, because they live there too.
Reflecting back I'm blessed to have had the chance to experience such festivity, and to do it in Spain! And the fact that we were rejoicing in the coming of Lenten traditions made home not seem so far away. Yup I was missing MN...even the snow. Like I said, I'm crazy. So today I look back 4 years to my time in Spain, and will think about the Carnival that is happening half a world away.
Monday, March 3, 2014
Peter Rabbit Baby Shower
Games:
- Guess the Baby Food. Remove the baby food labels and let guests smell (or even taste!) each baby food jar. The guest with the most answers correct wins.
- Color the Alphabet. Print out large empty block letters and spread them on a table. Guests should draw a picture of something that starts with each letter. ie. The "C" letter could have some carrots, a cat and a cactus.
- Have guests write words of wisdom for the new parents in a scrapbook or cards. Compile the encouraging notes for the parents to read.
- I found carrots, bunnies and eggs at my local Michael's store for inexpensive. Shop right after Easter to get a steal on some of those items.
- Grab a few Peter Rabbit books and display them throughout the area.
- Purchase a new teddy bear for the baby and dress it up with bunny ears.
For prizes, we gave away carrot shaped Reese's pieces candy packages. We also made sure to place some balloons throughout the shower area. Since the couple didn't know the gender of the baby, this was a great theme! since it focused on the cute Peter Rabbit, we could use pinks, blues and yellows in our decor. The parents to be also were able to take home the decor goodies.
Other Baby Shower themes on the blog:
- Circus
- Little Pumpkin
- Little Man
- Minnie Mouse
- Pumpkin Diaper Cakes
- Traditional Diaper Cakes
- Building a Baby Basket
Subscribe to:
Posts (Atom)