Thursday, June 11, 2015

Columbus Zoo, Ohio

Columbus Zoo is known to feature some great animals.  This was my family's first stop on our RV adventure last summer.  Starting in Ohio we knew we had to stop at the Columbus Zoo. Two of my FAVORITE animals were at this zoo! I may be in my mid twenties, but I was acting like a small child just absorbed by the wonder of seeing my favorite animals. 

Zoos have always been a fun family activity.  Growing up we went to the Como Zoo many times, until we moved within close proximity to the Minnesota Zoo, which we regularly visit each year.  Then whenever we go on vacation we usually visit the state's zoo.  And now living in Ohio near the Toledo Zoo we're able to make it out there at least once or twice a year. But while out in Ohio we had to seize the opportunity to visit the Columbus Zoo and hopefully will manage to get to the Cincinnati Zoo too.

But back to why I LOVED the Columbus Zoo. 

KOALAS have been my childhood favorite animal and the only time I've been able to observe them was at the San Diego Zoo in California, so boy was I surprised when I found out they were also residing in Ohio. Considering the likelihood of me ever traveling to Australia is minimal and the only koala I've been really close to is my stuffed animal version, this was a dream.  Forgoing embarrassment I took MANY photos and gleefully was squealing when the 1 of the koalas awakened and was moving about to eat his eucalyptus. Did you know they sleep 18-20 hours a day?! So now you see why I felt seeing this was a small gift, and we had him all to ourselves.  Loved the two habitats, an indoor and outdoor so it allowed multiple observations.

Can you see  the koala I'm pointing to? It's in the tree.


My other favorite animal is the MANATEE! Ever since visiting Florida and seeing the manatees there they've always been a soft spot.  In high school our math stats class sponsored a manatee. Not the sting ray that also joined these giant sea cows. Apparently this is the only vegetarian sting ray since it loves to much on the romaine lettuce with these giants.  This was a different set-up than in Florida, since the view of the tank was only eye-level, but you still got an eyeful.  I even walked out with my own manatee....okay it may have been a stuffed animal, but every time it makes me smile! 


They had great habitats for Australia like the Lorikeet Garden (see photo), which allowed you to walk in the lorikeet aviary, feed the birds and have birds land on you. The Kangaroo walkabout had you get up close and personal (see photo) with full size and joey kangaroos. Of course the koalas and orangutans were my idea of the perfect entertainment.

In Africa you can feed the giraffes and get a look at the other typical African animals.  Also their Congo African expedition  section of the zoo has leopards, gorillas, bonobos and mandrills.

Polar bears show up at most zoos, but they did a nice job with the viewing opportunities in the polar bear habitat.  Want to make more of your trip? Hot day? Zoombezi Bay is a waterpark connected to the zoo if you have small children and want to make a full day out of the trip to the zoo.

Just missed the joey as he popped out of mom's pouch!


It's easy to spend a few hours there, and if you're like me, you can almost never get enough.  Check out the website Columbus Zoo to see the park map, live webcams of some of the animals and event promos.

The Columbus Ohio Zoo didn't disappoint!


Wednesday, June 10, 2015

Fools Gold Series

Susan Mallery has created the town of Fools Gold.  It's amazing how this idea has grown from just the setting it started off as in the books into a place that people truly wish they could visit.  So much so that it led into the creation of a website focused on everything happening in Fools Gold. If you link to this site, http://foolsgoldca.susanmallery.com/ , it tells you all about the big events happening in the town.  Characters you have gotten to know in the first set of books routinely pop up throughout the other books.  And as Mallery adds more books to the selection you stay up to date on the relationships you've seen develop, the benefits of a small town. 

Personally I just liked reading the saga as I felt I was peering into the lives of people that make up the charming community of Fools Gold. But if you did get more invested, since she has a LOT of fans out there, you could check out the who's who, a map of the city, current events, and of course the books that started it all. She has some unique characters with interesting careers that take you outside the realm of your normal day and knowledge of the current job scene.

In need of a summer getaway? A little romance? Check out Fools Gold, you're sure to be captivated and charmed by this small town community.

1. Chasing Perfect         2. Almost Perfect       3. Summer Brides (Novella)        4. Finding Perfect          5. Only Mine           6. Only Yours       
7. Only His        8. A Christmas Bride         9. Only Us (Novella)     10. Almost Summer (Novella)        11. Summer Days         12. Summer Nights     
13. All Summer Long     14. A Fools Gold Christmas        15. Halfway There (Novella)        16. Fools Gold Cookbook        17. Just One Kiss      
18. Two of a Kind          19. Three Little Words          20. Christmas on 4th Street        21. When We Met        22. Before We Kiss    
23. Until We Touch       24. Yours for Christmas (Novella)      25. Hold Me        26. Kiss Me          27. Thrill Me          28. Marry Me at Christmas


Similar series of modern day romances featured on the Blog:
Debbie Macomber : Cedar Cove & Blossom Street
Nora Roberts: Bride Quartet
Sherryl Woods: Chesapeake Shore

Monday, June 8, 2015

Family Recipe Binder

Food and family.  These two things mean everything, and it's even better when you combine the two.  Its always been a special act to share recipes, as food can bring such happiness and a sense of togetherness.  People frequently used to write down their recipes and pass them on to those they love.  Its so fun for younger generations to get these tasty treasures handed down to them.  In our family there's a special way to get these recipes...you get married!

It has become a tradition in our extended family to gather all the favorite recipes from grandparents and aunts, and assemble them in a binder to gift to the bride.  And all the brides love it! It's such a fun, and sentimental gift to receive to celebrate the start of a new life.

The perfect time to gift the Family Recipe Binder is at a bridal shower. The recipes also make a great wedding gift.  Enamored with this recipe tradition I wanted to do it for a few other special brides in my life, like my sister-in-law and best friend.  We compiled recipes dated back to grandparents, great and great-great grandparents.  There's just something special about having a recipe card in your relatives handwriting that makes it a piece of history, a piece of them.

Interested in bringing this recipe sharing tradition for new brides into your family? Here's what you'll need to pull it off. 


MATERIALS:
*3 Ring Binder 2.5"- 3" (pockets on inside of covers is nice)                
*Pocket Tab Dividers #5 or #9        *Family Recipes 2-5 per relative
*Clear Sheet Protectors                   *Paper/Stickers/Paper Cutter

DIRECTIONS:
1. Choose a fun binder color and other accents like stickers or scrapbook paper. 
     Ex. Candyland was my fave childhood game.
2. Add pocket tab dividers with labels for each.
     Ex. See Melanie's binder picture.

For 5 dividers:  1) Appetizers   2) Salads    3) Side Dishes    4) Entrees    5) Desserts

     For 9 dividers:  1) Appetizers  2) Soups & Salads  3) Side Dishes   4) Pizza & Pasta  5) Chicken & Turkey  6) Beef   7) Seafood & Pork   8)Vegetarian/Gluton-Free    9) Desserts

I ordered them based on when served in a meal and color coded to what food type it would likely represent to me.  The bride can always rearrange it later.
Green: soups & salads  Yellow: chicken Blue: seafood/pork  Orange: pizza & pastas 

3. Relations bring recipes in sheet protectors to add to the binder at the shower or send ahead of time to the one in charge of the binder assembly.


RECIPE PORTION:


1) Plan at least a month or more for people to gather recipes since they'll need to find them, type them up and/or scan the original recipe card.  If it's a recipe card from a grandparent or older generation it's a great idea to retype the recipe, but also include an image of the original card.  That way you can keep the feel of history that comes with the particular recipe.

2)  These are the instructions that I included when reaching out to relatives.
  • On 8x11 paper include ingredients & directions to the recipe. And specifics like servings, cook & prep time. Include your name on the recipe.
  • Recommend adding a picture of the food, color to text or experiment with fonts. Ex: "Grandma made this every Easter", "Perfect for picnics"
  • Ask each relative to bring/send 2-5 recipes from the following categories: Appetizers, Salads, Side Dishes, Entrees, Desserts

3)  Insert recipes into sheet protectors and place in binder under appropriate tabs.

Hope you and your family enjoy the craft as much as mine!  Its keeping that connection amongst the family members that's one of the reasons to do this.  That and a bit of family history.  And don't forget good food. Pass on your family's food tradition to new brides, a gift they'll use endlessly and be sure to preserve with a Family Recipe Binder.

Saturday, June 6, 2015

Memorable Moments Log

 
School's out for summer! I survived my first year of teaching!

  I had so many great memories this first year of teaching, and it was everything I always thought it would be! I started with high hopes and expectations, and I'm happy to report I met them all!  I've always felt that this was a calling of mine, but started to become doubtful when I couldn't secure a position out in Ohio.  But God answered my prayers, and it's been clear this was his plan all along, so I'm so glad I was patient (or at least tried to be).    
     
 As the school year wrapped up I enjoyed paging through my Memorable Moments Log. My bestest friend, who lives only 15 min away (another gift/sign from God) gifted me with this before I started my school year. A log to write down good memories that happened that day. Isn't she the sweetest?!

Now I'm not the greatest when it comes to a daily routine.  Never been one to remember to take a vitamin everyday for instance, anyone else have that problem?  So instead of writing something everyday I just periodically wrote if something really special, funny or memorable happened! Whether it had to do with school like a compliment from a co-worker or a student, a fun activity or lesson that worked just perfectly (gotta appreciate when that actually happens). Or maybe something outside the school doors like a wedding, birthday party, graduation parties, track, prom etc. 

I just put it somewhere in plain view so I can see the most recent memorable moment and add to whenever I can. All you need is a carton or other container, notecards & a date stamp. Since there are 10 lines on the notecard, you could do this over a ten year period. 

Gift idea for : 
New teachers / teacher appreciation
Newlyweds
New parents to log their child's milestones, funny sayings
College student

Really ANYONE could find a use for this! So make one for yourself or for a gift and help preserve those moments that are worth reliving.


Once ten years rolls around I'll either keep as is, or hole punch and put a ring through it.
Then keep with other special memory projects like my Bridal Memory Book, Family Recipe Binder, Creating Beach MementosTrip Keepsakes, Memory Ornament Ideas (Picture Perfect, Graduation Tassel, "Marry" Christmas) and Special Occasion Card Collections.

Thursday, June 4, 2015

Blossom Street Bundle

http://www.barnesandnoble.com/w/good-yarn-debbie-macomber/1100344892?ean=9780778328803It's SUMMERTIME! Lisa and I are finally back from our blog hiatus, and it feels great. Bogged down with my first year of teaching, picking up a book for an enjoyable read was undeniably satisfying! And I gotta say that I definitely plan on knocking out some book series this summer.  So here's one to start with that I just finished.

If you're looking for some nice clean summer romance reads, here's a great list to consider! They're quick, inspirational and the perfect book to bring along for a relaxing read on a beach or a summer porch.

Something to know about the author Debbie Macomber is she's a knitter.  It was this love of knitting that inspired the series.  Although not a knitter myself, even if I'd like to posses the talent one day, it was enjoyable to read.  Some of the books in the series are fun because they are based on four or so individuals joining a knitting group.  The book bounces around to each of the knitters and shares their stories.  As the series progress the books are intertwined, so there are references back to those original characters you first had interest in. 

The Shop on Blossom Street
A Good Yarn
What Amanda Wants
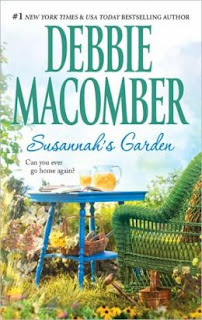
Susannah's Garden
Christmas Letters
Back on Blossom Street
Twenty Wishes
Summer on Blossom Street
Hannah's List
A Turn in the Road
Starting Now
Blossom Street Brides

Check out my post on the Cedar Cove Series that first made me addicted to her books. 
http://www.harlequin.com/storeitem.html?iid=30251http://www.harlequin.com/storeitem.html?iid=31613
http://www.barnesandnoble.com/w/susannahs-garden-debbie-macomber/1100189598?ean=9780778328841

http://books.harlequin.com/search#w=twenty%20wishes

Wednesday, April 15, 2015

DIY Animal Ring Holder

If you would have asked me six months ago if my husband is a patient guy, I would have probably said that he is not. We are both self-proclaimed impatient people. We joke regularly about how God likely thinks we are hilarious because we always seem to be learning patience in one way or another. I believe I wrote about this when I told my engagement story. No surprise, we are still learning the same lesson.

Recently though, it has come to light through living with me that he is an incredibly patience dude and must love me a lot. As you can tell from the blog, I pretty much constantly have my hand in some sort of project. Joe just smiles when someone tells him that he has glitter on his face. I am always moving things around and the desk space typically covered in whatever I am in the middle of working on. Now, you can see, he is an angel.

I recently decided to surprise him with a little DIY craft that was just for him. He prefers to not wear his wedding ring when he goes to the gym so I decided to make him a ring holder. This way, he will always know where he stored his ring.  

Animal Ring Holder

Supplies:
- Plastic dinosaur figurine (You could chose anything from a deer to an elephant figurine)
- Paint in your desired color (I chose white to match our bedroom colors)
- Finishing spray (I prefer a high-gloss spray)

Directions:
1. Remove any stickers or tags on the figurine. Paint the first coat onto the figurine. 
2. Continue painting until you reach the desired look. I had to do several coats since I chose white paint.
3. After the paint dries, spray a finishing gloss over for a polished look.
4. If this is for a lady, you can also glue the figure to a dish or tray for additional jewelry storage.


Tuesday, March 17, 2015

DIY Jewelry Dish

Say hello to my latest and greatest DIY project. I love this one because it was inexpensive, quick and way cute! Jewelry dishes are trendy right now and who doesn't need a sweet little tray to place their knick knacks on?! You can fully customize your dish and I chose to keep it simple and feminine.

This was a project from the book: Happy Homemade Home. My sister-in-law gave me this book for my birthday and it has sweet DIY projects, recipes and ideas. It is a great resource for inspiration!

Supplies:
- Plastic or glass dish
*I found this acrylic plate at Target for $0.99. They also had a bunch of clear and white glass options for $2.00-5.00.
- Spray paint or Acrylic paint
*I used both!
- Stencil stickers
*I used cursive sticker stencils, found at Michaels.
- High gloss finishing spray

Directions:
1. Start by removing any stickers on the dish and painting the top of the tray whatever color you'd like the shape/letter to appear as.
2. Once dry, place your sticker stencil into place. I used the letter "M" to make it a monogram tray.
3. Spray the dish with the spray paint of your choice. I used some gold spray paint on the back and front of the dish. You may need two coats depending on your color.
4. Once dry, carefully peel off the sticker and cover with a gloss finishing spray.


Happy St. Patrick's Day

I just cannot seem to do anything simple when it comes to having people over. As soon as we make plans, the wheels in my head start turning. Last weekend, we decided to host a little get together. All of a sudden, I am intensely planning decor and dishes! Does anyone else have this problem? Check out my attempt to stay small with our St. Patty's Day get together.


Food:
- Fruit organized as a rainbow
- Veggies made to look like a shamrock (This was a bit of a fail but oh well!)
- Shamrock shaped cheese with crackers
- Chocolate covered Oeros


Drinks:
- Guiness
- Irish Cream
- Green sodas

Decor:
- Green polka dots: paper straws, plates and banner
- Foam and paper shamrocks
- Gold coins
- Orange tulips


Happy St. Patrick's Day!! 

Thursday, March 5, 2015

DIY Cork Monogram

I am trying something new by reposting a project. I already wrote a post about my cork project that was used in our wedding decor but wanted to resurrect it since I never gave detailed descriptions on the how-to. This cork project was months and months in the making. These are corks from my friends' weddings, from work events, from my parents, from our engagement party, from friend get-togethers and from in-laws. This was used on the guest book table at our wedding and now graces our home.


Supplies: 
  • Glue gun
  • Wooden or cardboard letter
  • Spray paint
  • Corks
*You can either collect corks on your own or you can buy them in bulk. They can be found on Amazon, eBay or at your local craft store.

Directions: 
  1. Sort the corks as you desire. I wanted our letter to have a whole mix of colors but an ombre look is also beautiful as well.
  2. Paint the letter in your desired color. I went with purple to go with our wedding colors.
  3. Strategically glue corks in the layout. Make sure that the bottom row sits flat so that it does not tip over when set upright.