Sunday, December 11, 2016

Cranberry Mason Jars

It is December! I can hardly believe we are entering the Christmas countdown. We had our first big snow here in Minnesota and that was a reality check that winter is upon us. Time to cozy up with some hot cocoa and make the house pretty, if you haven't started already!

Marie and I spent a little time over Thanksgiving weekend working on a mini blog shoot and are so excited to share our simple, inexpensive (we had most of the supplies in our houses already) and gorgeous winter tablescape with you!!

Cranberry Mason Jar DIY


Supplies:
- Fresh cranberries
- Mason jars of various sizes
- Pine branches
Note: We clipped a few from Marie's Christmas tree
- Floating candles

Directions:
1. Start by filling each jar with a handful of fresh cranberries.
2. Add water to each jar.
3. Put a sprig of pine branch into the base of the jar.
4. Top with a floating candle.


Next, we wanted to take these jars and make them into a nice tablescape that you could showcase throughout the winter and for any upcoming holiday parties. We kept it fairly effortless and used pieces that we already had in our Christmas storage. Sorry for the lack of "before" photos, we were so excited about this one that we totally forgot!

Supplies:
- Cranberry mason jars
- Two fake pine and pinecone sprigs
Note: Found at Michaels or your local craft store
- Christmas bulbs


Monday, December 5, 2016

Reindeer Donut Pops

I hosted a Crazy Christmas lunch for a Christian girls group of 5th and 6th graders that I lead. We had so much fun and the girls really enjoyed themselves!

This is a similar idea to a mystery dinner or crazy dinner where the kids have to pick from the menu, having no idea what they are really ordering. We themed our lunch around Christmas so we named the different dishes things like: Olaf, snowflakes, poinsettia and elf.


Unfortunately, in the mad rush of prepping the meals, I did not have much of a chance to capture photos. Which is a bummer because the snowman-shaped sandwiches were darling!

I did, however, document the most important part: dessert. These reindeer donut pops were the final piece of the lunch and the girls were tickled!


Reindeer Donut Pops

Supplies:
- Package of small chocolate donuts
Note: You can use powered donuts for snowmen donut pops!
- Wilton's candy eyeballs
- Decor candies
Note: M&Ms work great as well
- Pretzels
- One bar of melting chocolate
- Lollipop sticks


Directions:
1. Melt the chocolate in the microwave for 30 seconds or until smooth.
2. Push the lollipop stick through the bottom and middle of the donut.
3. Dip the back of the candy eyeballs and candies in the melting chocolate and place on donut.
4. Break pretzels in half and dip the bottom of each half into the chocolate. Insert pretzel into the top of the donut to secure.
5. Allow some dry time before serving.


Wednesday, October 26, 2016

Pumpkin Diaper Cakes


I love giving diaper cakes!  Instead of just giving the mommy-to-be diapers in a package, this is a fun way to dress it up, make it unique, and serve as part of the shower decor while still giving them a gift all new parents appreciate.  A diaper gift is a great gift idea to pair with something else, or depending on how over the top you get it could be your entire gift.

And since this was Lisa's baby shower I just had to do something special for her and her little pumpkin.

If you know the theme/colors ahead of time you can plan your diaper cake accordingly. Considering the Little Pumpkin theme, it seemed perfect to deviate from the traditional three tiered cake and go with varying pumpkin sizes.

This was a team effort with my mom. I shared with her the idea and she successfully obtained the items we needed to create our unique baby pumpkins.


Materials :


-Diapers (1 package)

-Baby socks

-Orange onesie

-Tablecloth or Tissue Paper

-Ribbon

-Rubberbands

-Scissors

-Paperclips


Assembly :

Large Pumpkin


1. After purchasing or gathering supplies you're ready to start.

2. Take a third of the diapers in one of the packages for the center. And secure together, either with rubber band or ribbon to create the center of the pumpkin.


3. Then to create the circular shape of the pumpkin, stagger diapers vertically and secure those with a rubber band (or ribbon) near the base of the diapers.


4. Now to fill in the pumpkin, pile on other diapers to make a rounded top.


5. Next take your plastic table cloth.
Another option would be to use tissue paper, either are cheap. If we had chosen to go the tissue paper route we would have used thin ribbon to create ridges in the pumpkin. The benefit of using the $1 plastic table cloth is it creates its own folds that we could just accentuate, and was less brittle then tissue paper.
Fold the table cloth in half, hamburger style to create a thicker pumpkin skin so the diapers don't show through.


6. Gather the table cloth around the pumpkin, creating a bunch of the extra material at the top of the pumpkin. Now is the time to pleat or create more defined creases to your pumpkin. Cut off the extra material with a scissors.

7. Before you seal up the diaper pumpkin stuff the rest of diapers around the base and sides to create more of the right shape. This should help you use up the entire package of diapers.

8. Then using a rubber band secure the table cloth.  To hide the top we used orange curly ribbon for our vine/stem.

9. Take the "leaves", the baby socks and using paper clips secure to the top of the pumpkin.
 * Lisa loves turtles so these socks were just perfect for the pumpkin leaves!


You can bring the pumpkin as is, or choose to transport it on a cardboard piece in which you'd want to make it look as "pumpkin patch" like as possible.

Small Onesie Pumpkin 


1. Taking a onesie you can fill it with a few diapers and then tissue paper to create the round shape. We used the leftover table cloth we had cut to stuff the inside.

2. Simply tuck the bottom inwards and bring the sleeves and neck of the onesie on top. To help hide that we took our Ninja turtle socks, one was stuffed inside the other, and secured it on top with a rubber band.


They were that easy! Was so fun to make them with my mom, she's chalk full of ideas to help my inspirations come to fruition. Thanks mom!

So along with some gifts off her baby registry these pumpkins were way more fun than just a diaper box.  Not only do they look cute on the gift table, but they make great nursery decor until the parents need them those first few months.
 

Congratulations Lisa! 

I can't wait to meet the Little Pumpkin, he's pretty blessed to be coming into a family that is already crazy about him. And about his beautiful momma. 


Her Little Pumpkin Baby Shower will soon be featured on our NEW blog!

We can't wait to debut it for you!


In the meantime, to see how to make a 3 tiered diaper cake see my original post on Traditional Diaper Cake that I made for my best friend Melanie's first little girl.

Thursday, October 20, 2016

Little Pumpkin Baby Shower

We spent last weekend creating, cooking and crafting. Since the two of us live a couple hours apart, time together is such a blessing and a joy. We are so excited to share all of the recipes, ideas and pretty little details! This baby shower post is a long one but it is filled with recipes and decor that you could use for a bridal shower, fall themed bash or around your home this autumn season!

Little Pumpkin Shower

Food
Baked Apples:
This was one of the best apple recipes that we have ever tried! Not only is it delicious but also requires very little prep time and ingredients that you will likely have already in your kitchen. To see the full recipe, check out our previous Baked Dessert Apples post

Pumpkin Spice S'more Bites:
Ingredients:
- One package of marshmallows
- One package of graham crackers, crushed
- One package of candy melts or chocolate chips
Note: We used Pumpkin Spice candy melting chips from Michaels.

Directions:
1. Follow the directions on the package for melting the candy chips or chocolate chips.
2. Place a stick or toothpick into the marshmallow. Then dip into the candy melts/chocolate. Our candy melts were a little dry so we had to spoon onto the bottom of the marshmallows.
3. Cover with graham crackers.Allow time to dry before displaying.


Games
Guess the Number of Little Pumpkins:
This game is simple and some guests will love that it requires no toilet paper wrapping or smelling baby food jars (though we love those games too!). Fill a jar or two with pumpkin candies and have guests make a guess at the quantity throughout the shower. The person who guesses the closest gets to bring the jar home!

Guess the Size of the Little Pumpkin: 
Another baby shower game idea is to guess the size of the mommy-to-be's belly.  Guests estimate the measurement, cut the string and then the mommy-to-be sees who is the most accurate. For a pumpkin spin, have a large pumpkin and guests can guess those measurements as well. Or if you have a confident mommy-to-be, you could even see who is bigger!

Pumpkin Decorating:  
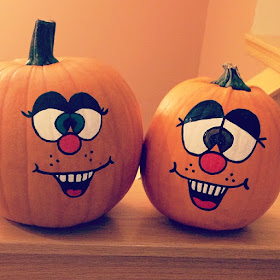
A fun activity can be to decorate small pumpkins, especially if your shower will be having a lot of younger guests. This could even turn into a guest favor!


Decor
Little Pumpkins:
We used a LOT of pumpkins for this shower decor. We purchased pumpkins from the Farmer's Market, Target, Michaels and Beyerlys. We scattered them on side tables and on the main table (full tablescape post coming soon!). They created some colorful pops of orange and white throughout the decor and food.

We found a printable on Pinterest and with some wooden boxes from Target, we had some darling shower decor!


Favors:
If I haven't said this already, Belvoir is my FAV! I was excited to share these with Marie so that she could try it. Since they make a mini bottles of Ginger Beer with orange labels, I knew this had to be our party favor.

You could also tie a paper straw and a tag onto it for an escort card or table setting. They are a little pricey but make for a perfect take home gift for shower attendees!


Thursday, October 13, 2016

Pumpkin Floral Centerpiece


This gorgeous centerpiece was a breeze and it perfectly completed our fall tablescape!!

Unfortunately, we got so carried away with creating that we didn't remember to take any preparation pictures. But it is incredibly simple! This piece would look amazing at a fall party, bridal shower or on your Thanksgiving table.


Supplies:
- Two bouquets of flowers
Note: You could use less floral if your pumpkin is smaller
- Large Pumpkin
- Knife for pumpkin carving
- Medium vase

Directions:
1. Start by carving the top of the pumpkin. We didn't scoop out too much since our pumpkin was already a couple of weeks old.
2. Place a vase with water inside the pumpkin. This will hold your flowers and help to keep the water from seeping out.
3. Arrange your flowers as desired and then display! We added lots of small pumpkins, gourds, pinecones and acorns on the sides to create a beautiful fall tables cape.


Below are the sources for our table set up:
Flowers: Downtown Minneapolis Farmer's Market
Large Pumpkin: Sam's Club
Small Pumpkins: Target
Gourds: Downtown Minneapolis Farmer's Market
Pinecones: Michaels
Tea Lights: Home Goods
Acorns: Target